It’s time!!! Time for Spooky Season Tech or Treat.
Check back Monday, Wednesday, Friday, Sunday, and Halloween for some fun Tech or Treats (or both!).

adventures in the math classroom

It’s time!!! Time for Spooky Season Tech or Treat.
Check back Monday, Wednesday, Friday, Sunday, and Halloween for some fun Tech or Treats (or both!).

This tutorial is combining two ideas together that I have previously shared. This first is a Magic Squares sheet by Jason Pullano, and the other was a recent post about self-checking sheet. This activity is great for a self-checking activity or as a clue in a digital escape room.
Many of the steps are the same, so I am just reposting them below so you don’t have to flip screens.

Create your Questions
I find it’s easier to have my questions and images (if needed) ready to go before I begin building the spreadsheet.
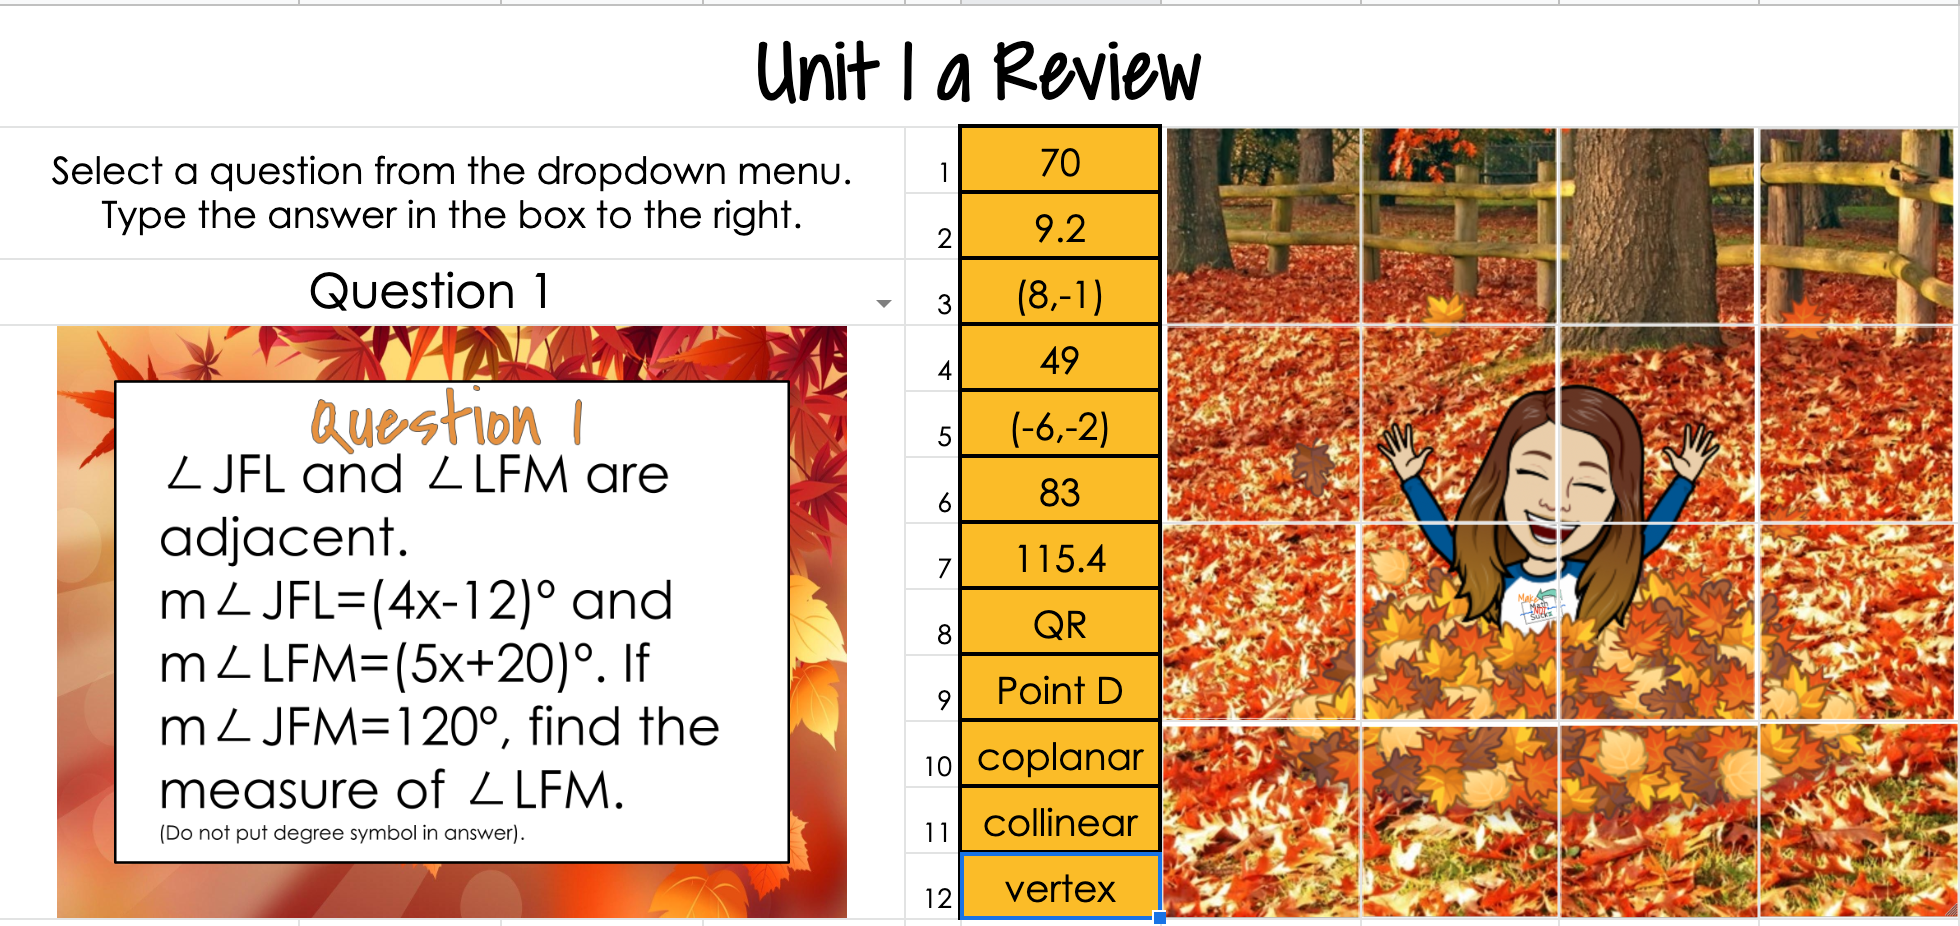
I’m using this for a Geometry review so I’ve created my images in advance in a Google Slide and I changed the page size to the standard 4:3. I can download each card as a PNG or JPG image to use in my self-checking activity.

Create the image
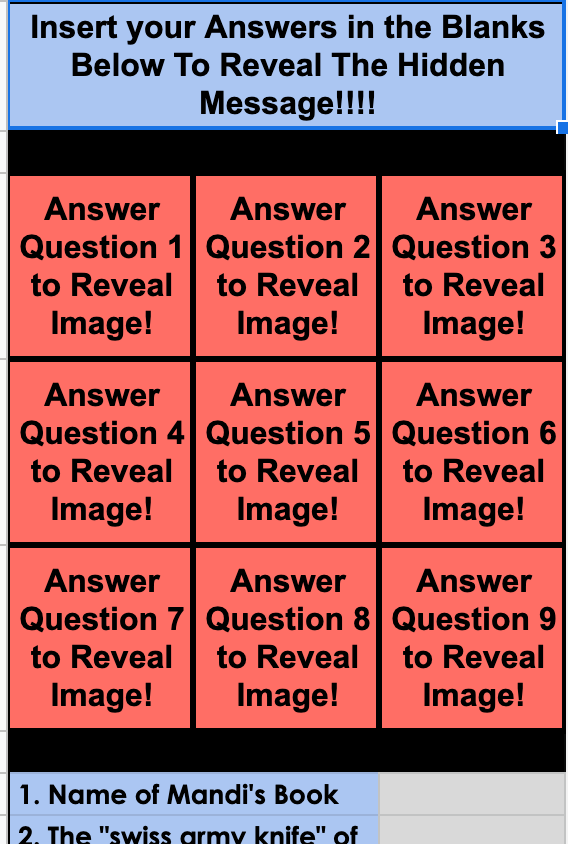
This activity loads an image into squares one at a time as a correct answer is entered. You will need to decide how many squares you want. I went with a 4×4 grid.

I used Google Drawing. In page set-up I set the size to 10 x 10.

Once your image is designed, place a table on top of it and drag it to fill the screen. I learned this trick from Jason Pullano. The table creates a perfect grid and you don’t have to worry about placement of the lines.

Now you crop your image. There is more than one way to do this but I chose to use my snipping tool and just snip each section. I found it helpful to zoom in to get a good snip.

Open Sheets
Now we will put this all together.
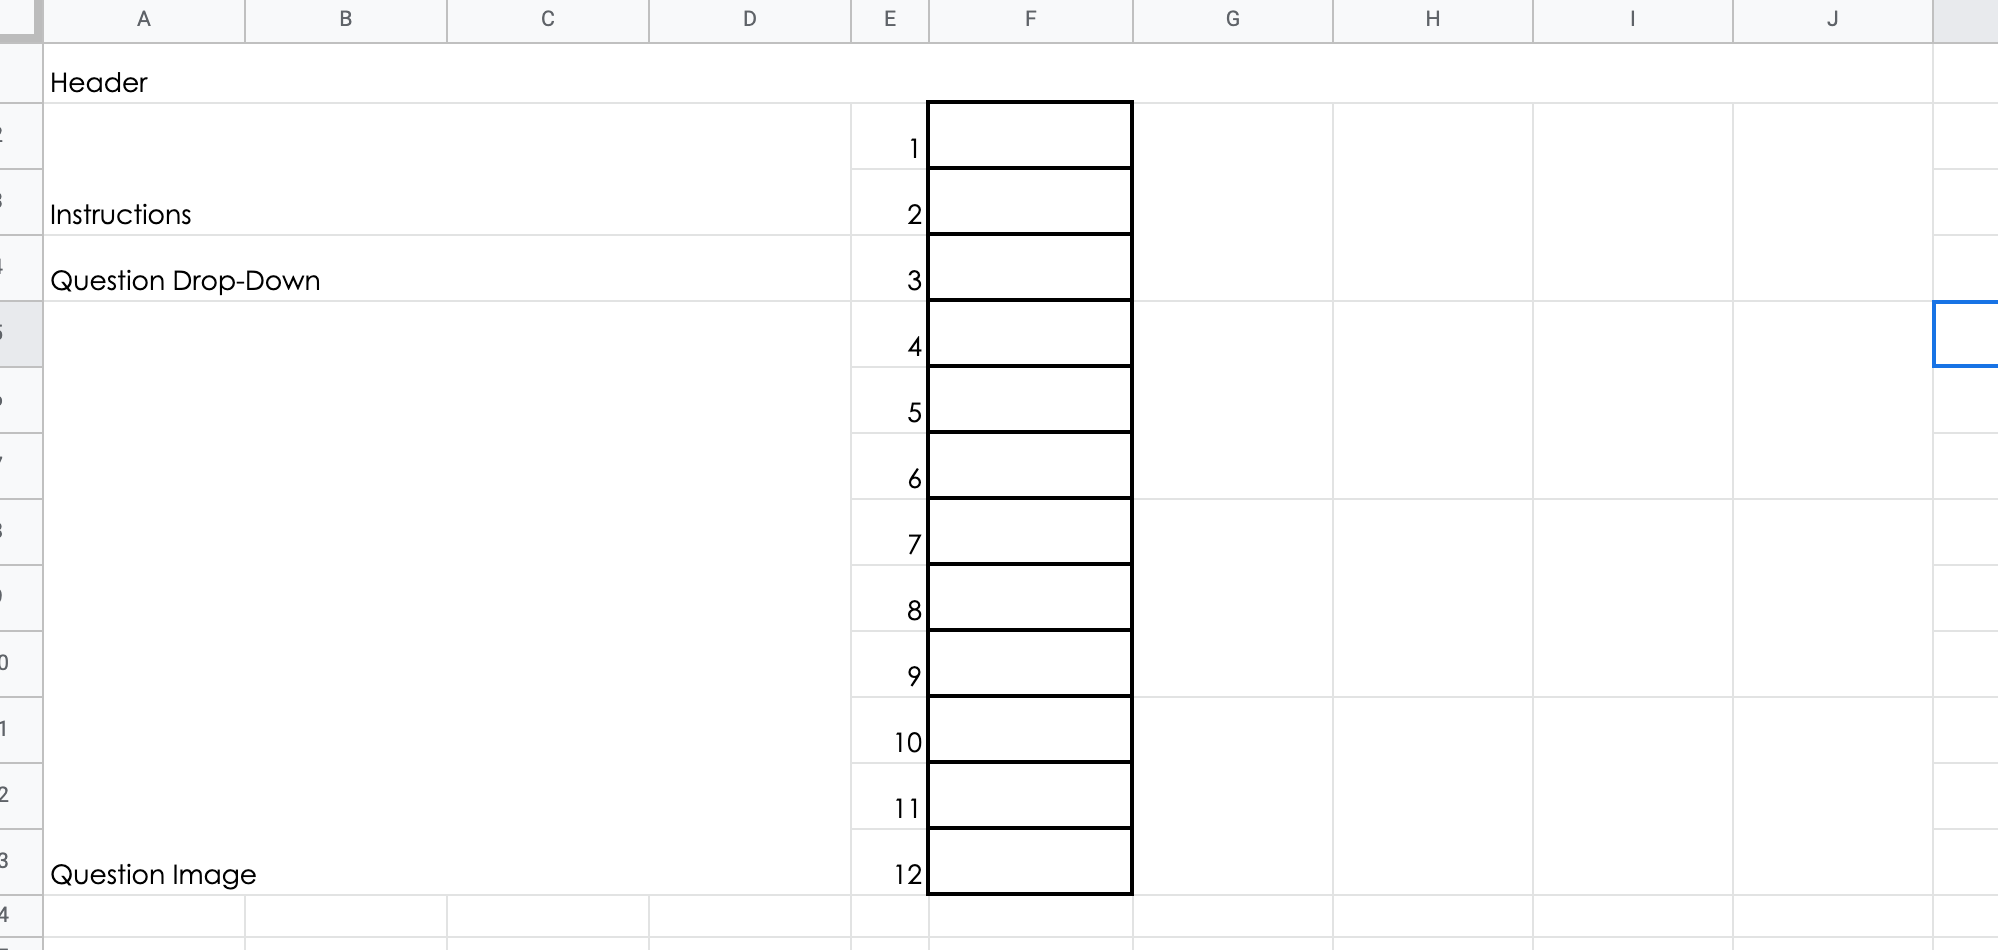
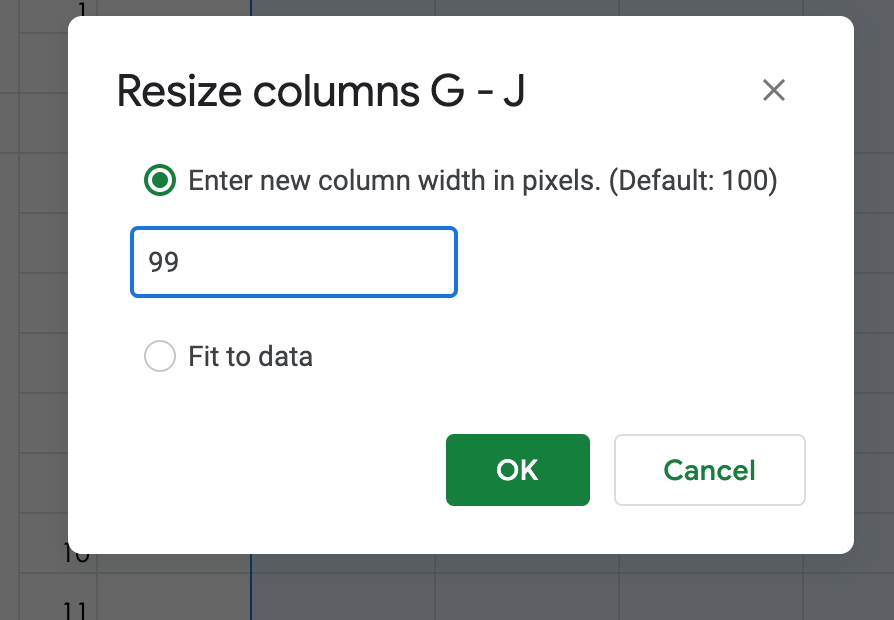
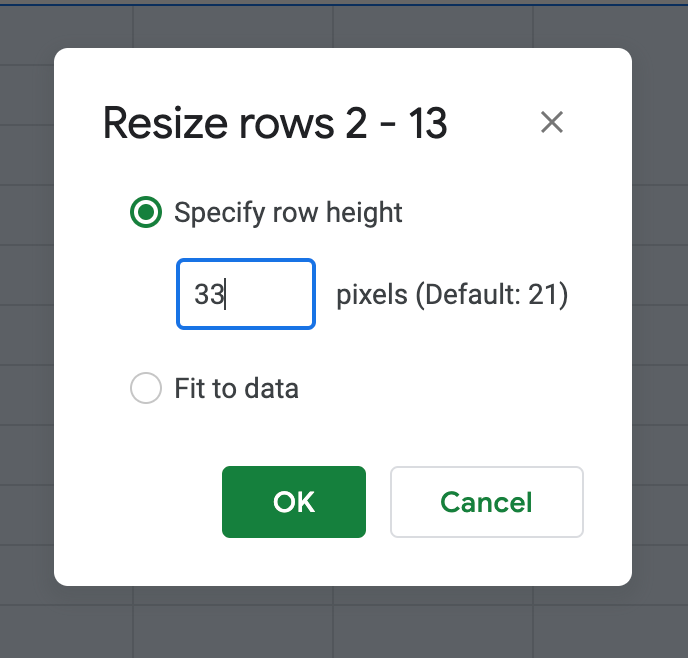
I start with my blocks of information. I merged cells to create the sections for instructions, question images, and also to create my grid. By selecting columns G-J and right clicking, I can resize my columns to 99. Do the same for rows 2-3 and resize to 33. This should give us squares.
I just typed in my header this time, but you could always create a colorful header like we did the last time. If you create the header image, insert instructions are below.


Place images and answer in a new tab.
Click the plus button in the bottom left corner of your spreadsheet. This will create a new tab in Sheets. This will be the location for out images and answers.

Place the images (insert image) for the questions and for the square reveal. They can be VERY TINY. It’s ok. It will scale to fit the size we allow it.
We also want to place the answers to our questions here. We are going to hide the tab later so students don’t see it.

Dropdown menu
Start with the dropdown menu where you have the word instructions. Place the same words, Choose a Question, Question 1, etc. in your list. You can view a tutorial here.
Now right below that, you will enter a vlookup code.
=vlookup(A4,Sheet2!A1:B13,2,0)
This is telling sheets to see what word is selected in A4 (Choose a question, Question 1, etc., then go to sheet 2 and select the image that matches my words that are in column A starting at A1 and my images are in column B ending at B13.
Answers
Now let’s set the conditional formatting for our answers. There is a tutorial for conditional formatting in the link above as well.
I’m going to have three rules for each cell. If the cell is empty, I want it to be transparent. If the cell has an entry it will be gold for correct or red for incorrect.
It’s a little tricky to get conditional formatting from another sheet.
Here is what you would type in:
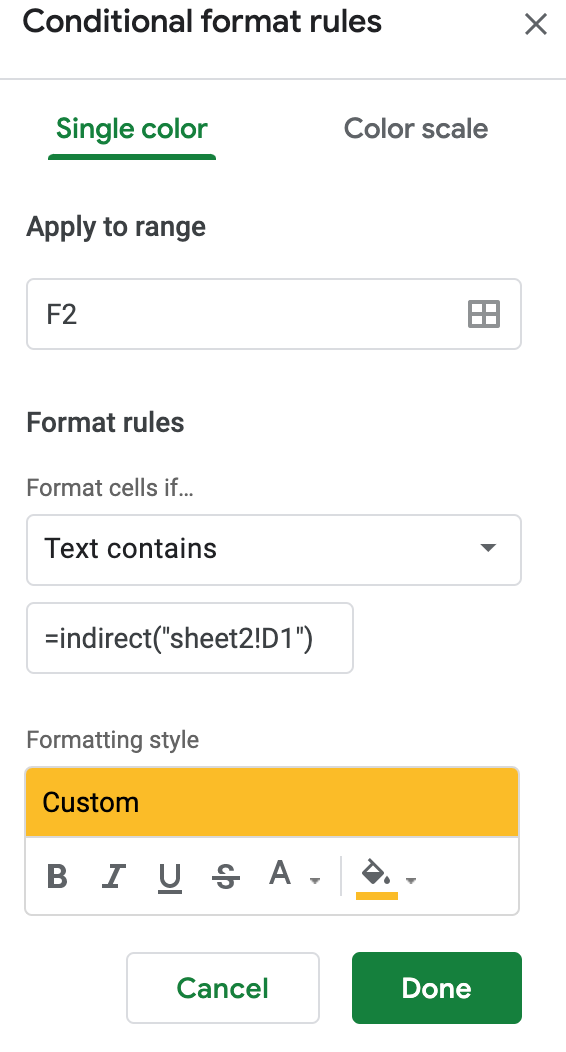
We will do the same thing to get a wrong answer but select text does not contain and type in the same formula and change the color to red.
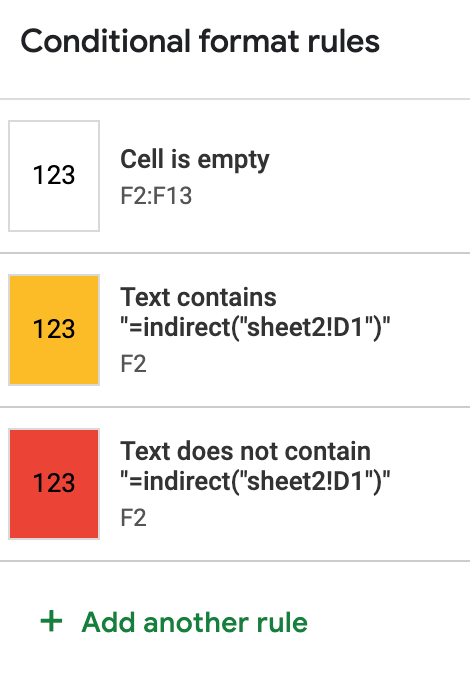
Repeat for the remaining answers.
*This seems like a lot of work, but this process allows you to use this template again simply by changing the images and answers in Sheet 2.
Load Image
Now we need to load an image square. When an answer is correct, we want a square to load in an image space.
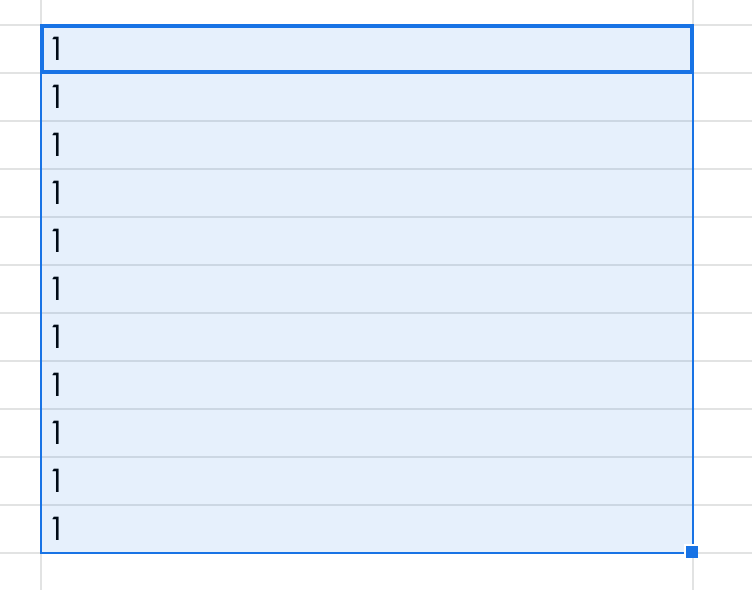
Below the fun stuff in Sheet 1, I have the sheet respond with 1 if an answer is correct and 0 if it’s incorrect using the following formula:

Once you return, there will be a little blue box in bottom right corner. You can drag that box down 10 spaces and it will auto fill the formula for you.
Choose a square you want to load. For this example, if the answer is correct it will go to sheet 2 and load the image in D1. You just need to make sure you load them in random order and that you include each one.

I have 16 boxes and only 12 questions so a few of my questions load to squares.

Clean it up and Assign
I like to hide the parts of the sheet we don’t need.
I’m going to highlight columns K-Z and right click and hide those cells

You can also hide the rows that have your adding trick on them by doing the same thing.
I’m also going to hide the sheet with my answers on it. Now a spreadsheet savvy student will now how to unhide this so you can always password protect the sheet so they can’t access it.

Don’t forget to set it to make a copy for every student in your LMS.
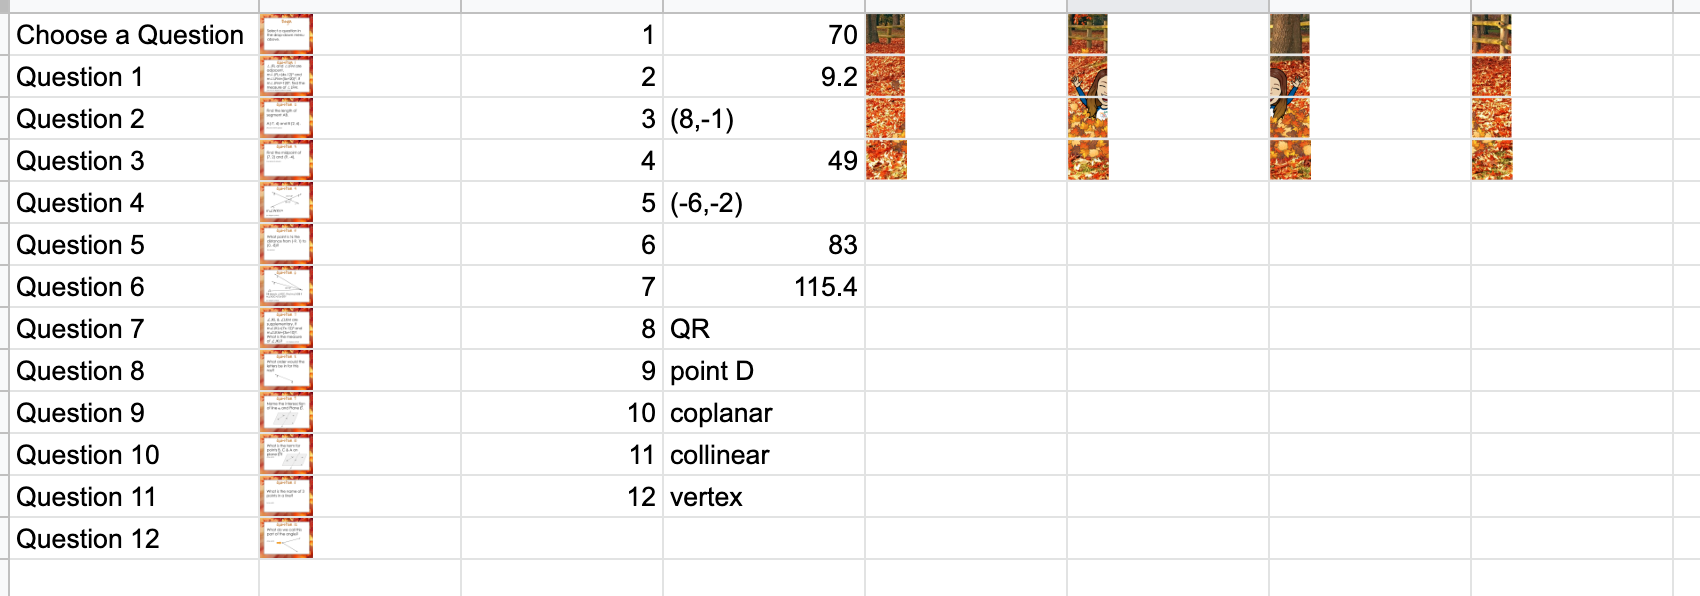
Here is the final result with all of the answers filled in:
These are so much fun. You can even get more advanced and have one image load and it changes to another image as you get the answer correct.
You can always just use the created spreadsheet below as a template if you don’t want to make your own. Just switch out the images and answers on Sheet 2.
If you make one, please let me know. I love to make these and my students love to complete these.

It’s been a minute since we had a fun with Google Sheets so I decided to bring you another installment as school is starting or getting ready start for most of us.
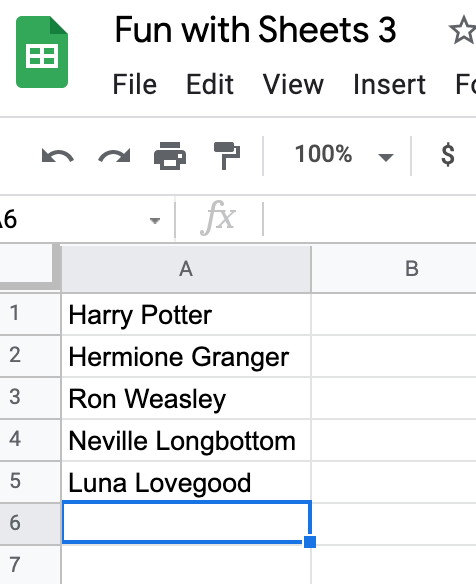
I like to copy the names of my students from my gradebook screen or download an Excel file of students from our grade management system (we use PowerSchool). This copies first and last names but sometimes I just need first names. I DON’T want to go through a delete all of the names, especially since I usually have around 150 students.
Never fear, Google Sheets are here! You can EASILY separate the names into two columns.
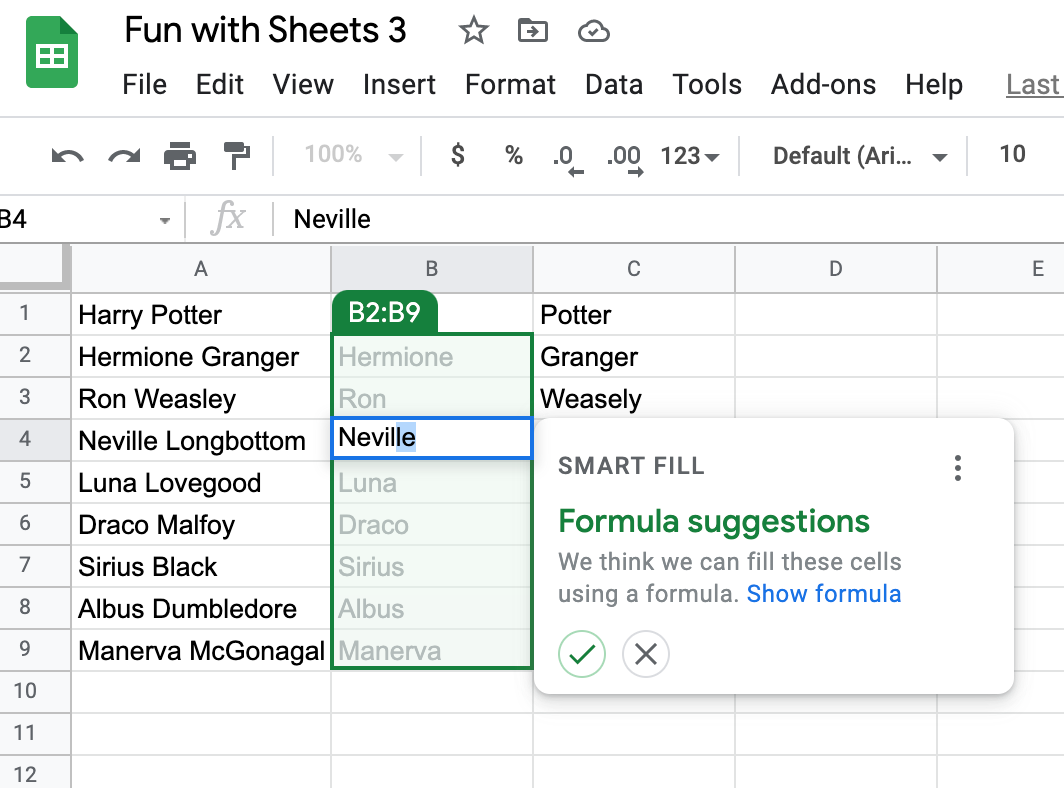
Begin by typing the names into two columns, just as you want them to appear. It may take a few names, but once Google Sheets understands what you are doing, Smart Fill will pop up a suggestion. Click the checkmark and Sheets will do the rest.
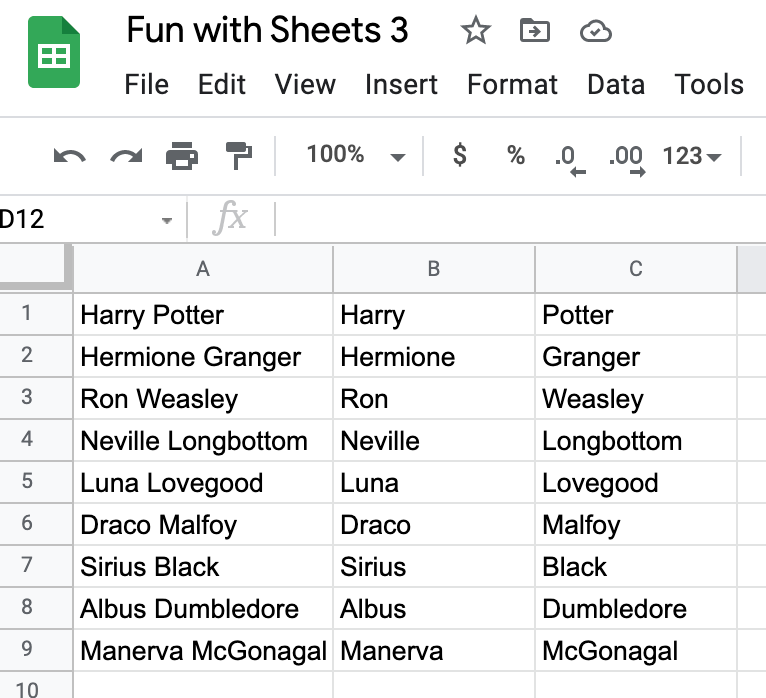
You will do the same for the last name column. Then you have the entire sheet broken into first and last names. YAY! Such a time saver.
The process also works in reverse. So if you have first and last names in two columns, you can type both in the third column and smart fill will recognize the pattern and fill for you.
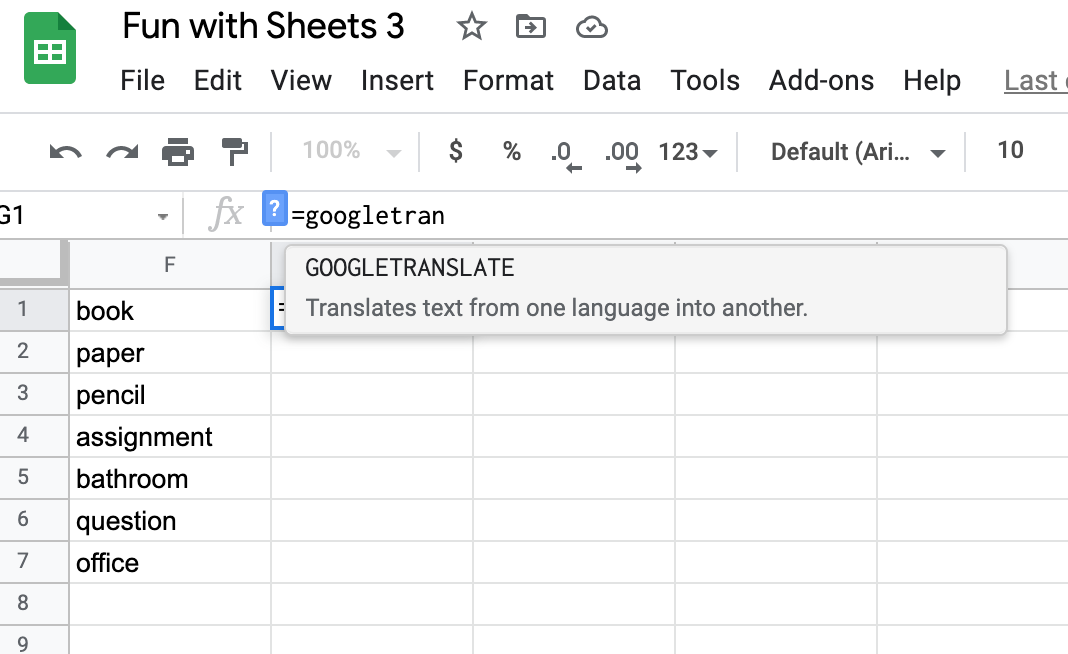
You can translate a list of words in Google Sheets. Type the list of words in one column. In the next column, type =googletranslate and and prompt will appear.
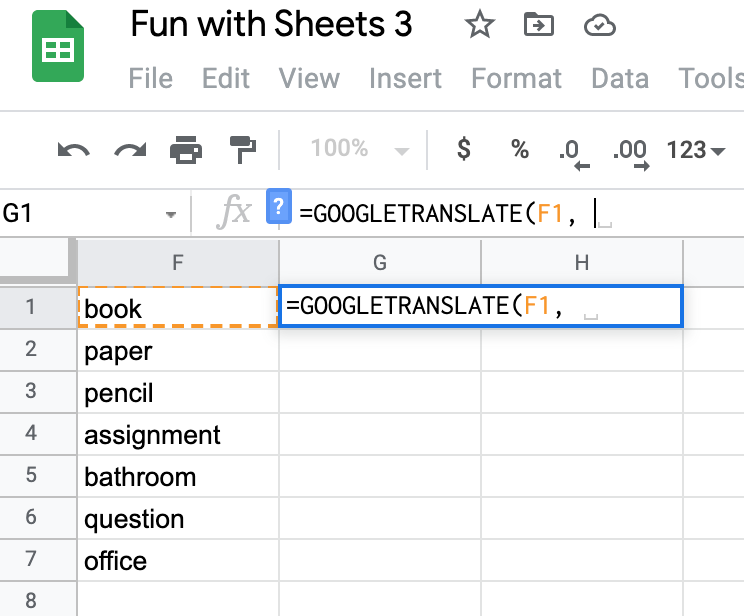
Next you want to click on the cell for the word you want to translate. Don’t worry, we don’t have to do this for every word, it will fill all of them in the end. It will place this cell into the formula, then put a comma and “auto” then a comma.
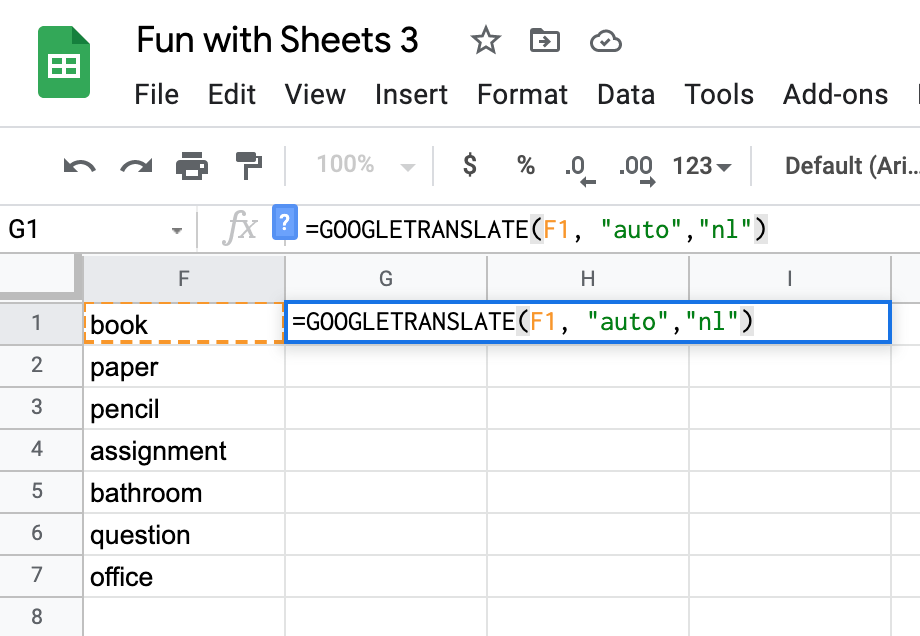
Now you need to find your two letter language code. These are called ISO codes and you can do a google search for them. Here is a link to the site I use. I’m translating to Dutch which is the code nl. So I will add the code in quotations and then close the parentheses.
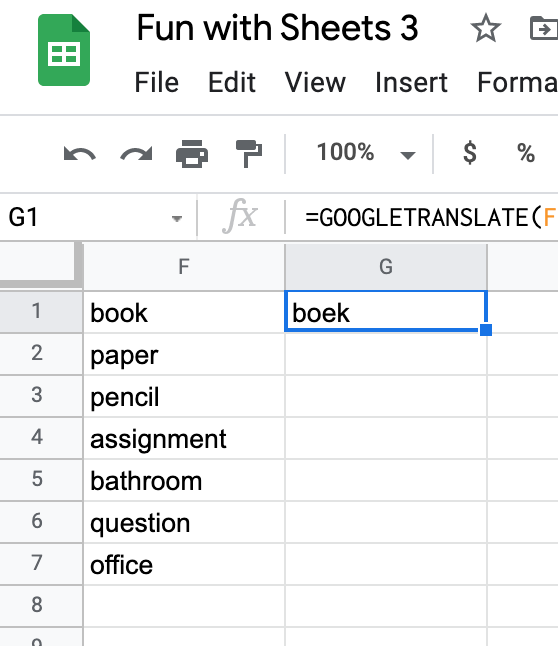
One word is translated.
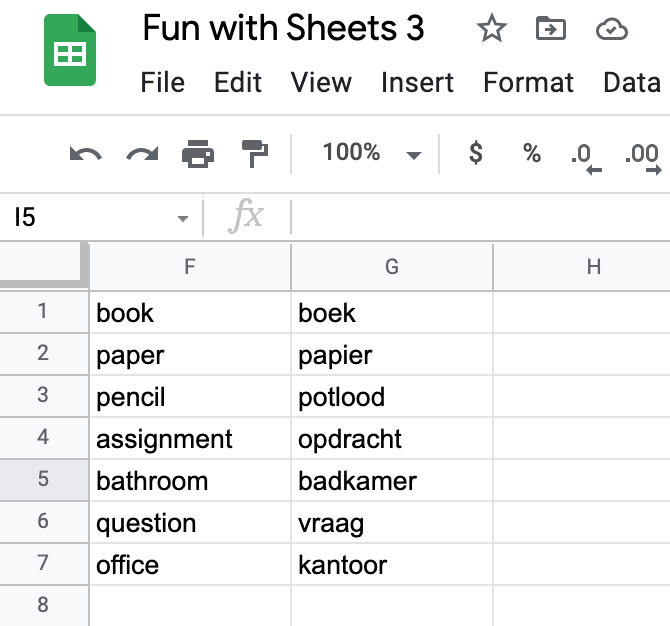
Now grab the blue box in the bottom right corner of that cell and drag down. You have translated all of the words.
I love to create interactive Google Slides for review games and escape room tasks. Most of the time the game works as it should. But every now and then a student figures out that you can click on the input box to see the answer. And, OF COURSE, they tell the rest of the class and now they are just entering the answer and not working out the problems.
Here is an example of a pixel art activity where this could be used. Many of mine have not been updated to this cell reference method but I will be updating them as I use them this year.

In this example, the student can see that typing 18.1 into D3 will give them the correct answer.
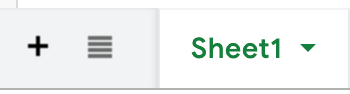
You can make this process more difficult for them. Using sheet 2 (click the + sign next to sheet 1 in the bottom row), you can type the answers into cells and then reference these cells on sheet 1.
I started in T33 to type my answers so it wasn’t on the screen if students click Sheet 2. You can also hide this sheet or password protect it so students can’t see it. If you do that, then just begin in A1 with your answers.

Replace 18.1 with Sheet2! followed by the cell where the answer is located, T33 for this example.
Now when a student clicks on the answers, they would have to unhide (if it’s not password protected) Sheet 2 then find T33 for the answer. I don’t usually password protect and it still deters most students.
Well, I hope you enjoyed this episode of Fun with Google Sheets and I hope you have a great start to your year!

** This is a repost from Make Math Not Suck**
We are not giving finals this year. An idea I think I support (it has been hard keeping motivation without a final). I wanted a way to review everything we have learned this year but in a fun way.
I originally planned to do a murder-mystery activity like I saw on Twitter shared by @MrsHiltnerReads.
After altering the idea so we weren’t murdering people, it turned more into a Who Dun It? which morphed into a Clue like escape room.
This idea could be used with any content for any review I would think. I just posted the links to the Slide, Sheet, and Form in Canvas but by embedding it in a Site, it would make might make it easier for students. about:blank
I also made a version using Alice Keeler dice roll page and markers where students could share the page with 3 other students and find the clues independently as they moved through the Get A Clue board. I would want to make one questions clues, however, to make the game go faster. Maybe I will try it the next time.
I hope you can use this or the idea of it to make the end of the year review more fun. Enjoy.

I stumbled upon this post on Twitter this past week about an Escape Room puzzle idea. You know how much I LOVE making escape rooms so I thought I give it a try. WOW! What a cool idea.
His name is Jason Pullano and you should give him a follow on (my favorite social media) Twitter. I didn’t alter this in any way other than to change colors to match my theme. His template is FIRE (to quote my daughter) and his video is very helpful if you are not sure what to do.
This is the link to the template he shared on Twitter.
Here is the link to MY puzzle.
Yep, I hope you caught that message! 12 Days of Techmas is coming soon!!!!
If you use this, please tag us both. Let Jason know how you used it! It makes people happy to see that what they share is beneficial!

If you didn’t know, I am a HUGE fan of Wakelet. See, I was at the very beginning of the Pinterest craze all those years ago because I LOVED the visual aspect of storing my bookmarks. Wakelet hits the visual aspect for me too but it’s easier to share with others and it can be COLLABORATIVE.
Chrome extension
I love the Chrome Extension for Wakelet. If I’m on a website, I can click the W in my extensions bar and it will open a save to Wakelet window! So easy, just like the save to Pinterest button that I love so much!!!
I love when I’m on my desktop version of Twitter (and the Chrome extension is enabled) that I can hit the W and save a tweet. When I’m on my phone, I hit the up arrow and save to Wakelet. Also sooooo easy!!!

Wakelets can be public. If you click on this link, it will take you to all my public Wakelets.
BUT, you can also may them private! This is perfect for student work. The private links are sharable, and only the people you share them with will see them. It’s a great way to share student work with the class and their families.
Wakelets can also be collaborative. You can assign each student a topic and they can add to a shared classroom Wakelet that is private to everyone except your class.
Spaces
This week, Wakelet released a new feature called Spaces. Basically, it’s a Wakelet full of Wakelets. Why would you need this you ask? Well, here are a few examples I have created just this week.
Digital Escape Rooms – I had 3 different Digital Escape Room Wakelets on my site. One was the escape rooms I have made, another was resources to create your own, and a third was escape rooms others had made. I had to share all three of them when I talked about escape rooms. NOW, I can just share the space will all my Wakelets inside.
Desmos Resources – We are always finding Desmos resources. I was just saving them to a Wakelet called Awesome Math Ideas. A few colleagues of mine ALSO have Desmos ideas saved. To make the process better, I made a Desmos Space and we have our 4 content areas in it. It’s now collaborative so we can all add what we find. This is going to be WONDERFUL!
So what can YOU do with Wakelet Spaces? I’m so glad you asked. Here are a few ideas, in addition to what I’ve shared above.
What will you do with Wakelet spaces? Tag @Wakelet and @MandiTolenEDU on Twitter if you use Spaces in your classroom. I would love to learn some new ideas from you!!!

If you’ve been around me at all, you know my love for Bitmoji. There are many posts on my blog about using them in the classroom. One way I like to use my Bitmoji is creating the main image in a digital escape room. You can see an example of it here and here.
During this Covid-19 virtual learning time, I have seen many teachers take this idea and remake their classroom. What a fun way to give convey information to your students. The process to make a virtual classroom is the same as the one I use to make an escape room image.
There are video tutorials available. Here are links to a few that are good.
and this website has compiled many posted Bitmoji classroom images for inspiration.
I learn better with step by step instructions and not a video so I thought I would put together a quick tutorial for you.
Before we begin, I want to emphasize the importance to using images with appropriate rights. Do not use images from a normal Google search. You might get images that are not free to use. In Google Slides, or Drawing you can insert image and do a search. These images are free to use. You can also filter your images in a regular Google search.

labeled for reuse: you are able to use these photos in any way that you’d like whether they be for commercial purposes such as your own website, or noncommercial purposes such as a school project.
reuse with modifications means everything above and you can remove the background, change colors, etc.
noncommercial reuse: you are able to reuse the photo as long as you are doing so in a place that doesn’t represent a commercial entity
Noncommerical reuse should give you the most options but if you plan to crop or change colors, choose with modification
Ok, now that the “Rules” have been covered, let’s make a scene.
 Open Drawing, Slides, or PowerPoint
For Digital Escape Rooms, I build mine in Google Drawing, but you can also make them in Google Slides or PowerPoint. Google Drawing and Google Slides have the ability to embed them in a website or anything that accepts an embed code. PowerPoint does too if you save it to One Drive. You want something cloud based to keep your links active if you are using it to share information. Google Slides and PowerPoint will embed as an iframe but Google Drawing does not, so make sure you know what type of embed code you need. If you are using Google Sites to house your escape room, Google Drawing is what you want to use.
 Find a wall and floor
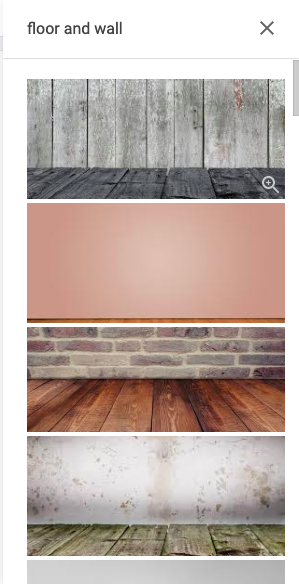
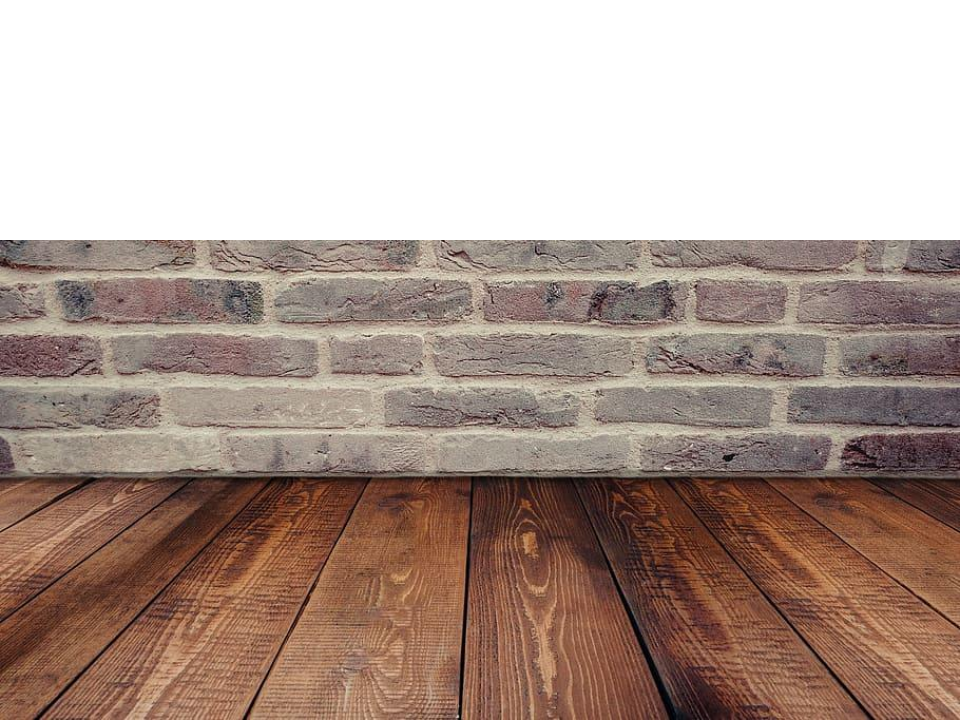
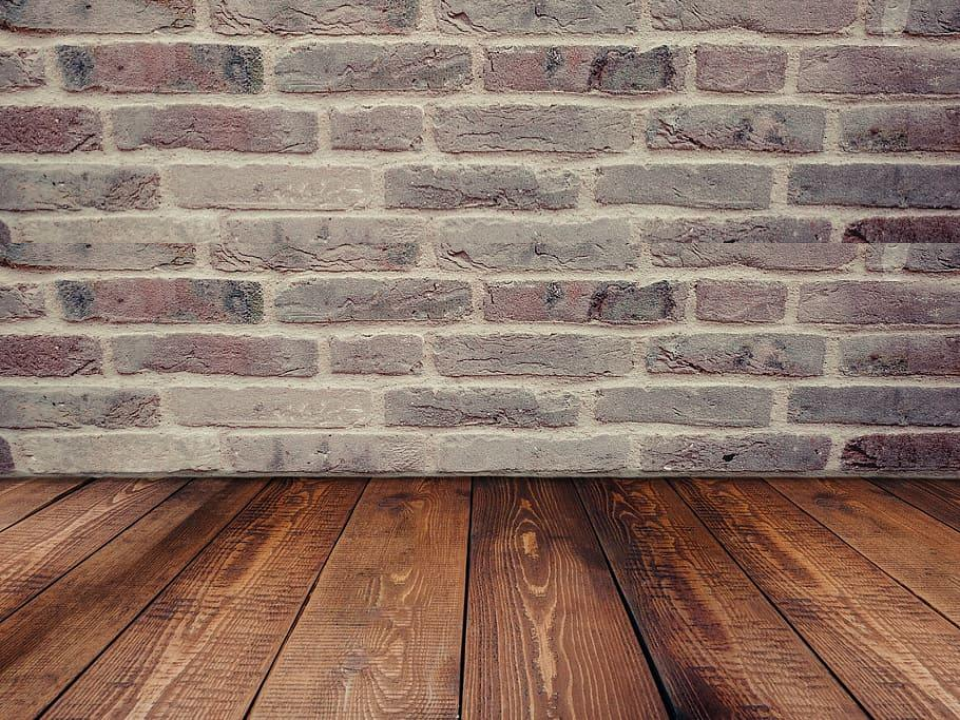
You can search for wall and floor and you will set options together. I will also just design my own sometimes. You can create a solid color flooring, for example gray for a concrete floor and create a pattern on the wall for wall paper. The first example below is a wall and floor created by me, including the baseboard. The second example is using separate wall and floor combinations found on the internet. For the one we make today I’m going to use a combo that I found online.
This link is a Wakelet of image resources. Sometimes a search just doesn’t get you what you want.
This was my search and the first few images that came up from insert – image in Google Drawing. I picked the second one and it wasn’t quite tall enough so I pasted in another and cropped out the floor. This is one of the reasons I like finding the wall and floor separate. You can make the wall and floor meet wherever you want.
 Add classroom elements and your Bitmoji
Now the fun begins. Using the same search methods or websites, start adding in furniture. Make sure you set the search to transparent or type transparent after the image to try to get transparent backgrounds. You can also make your own (Tutorial). In the two image in step 2, I made the sofa, rug, lamp, and shadows in image 1 and the desk in image 2. I used the shape tools in Google Drawing (Slides) to create them. You don’t have to do this but it is an option if you can’t find what you need.
Using the Bitmoji extension for Google Chrome will make adding your Bitmoji easier, just drag it from the extension to your drawing. If you don’t use Chrome or don’t want the extension, you can always email from the app on your phone. Saving the image from the email will retain the transparent background.
If you want to add in photos of pets, your own furniture, or other personal objects (the yellow mug with pens below), you can use remove.bg to remove the background. This also works for clipart, just make sure it has modification rights.
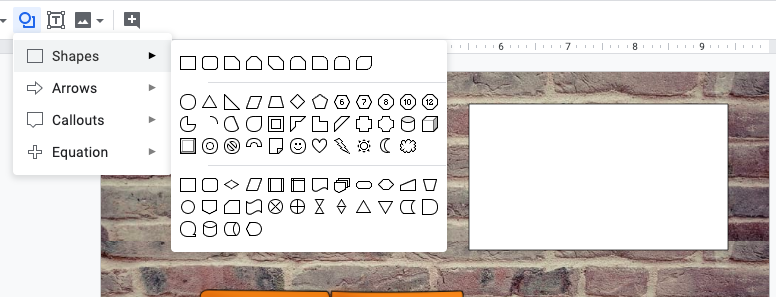
Making a whiteboard is easy. Draw a white rectangle and then using the trapezoid tool, create a frame. I use a gradient for the color. You can see a metal frame and a wooden frame below. The rug below is just an oval shape.


 Set Hotlinks
Once you have your image ready, you can set hotlinks on the image. If it is not a grouped imaged you can click the image and the link symbol![]() and type in or paste the URL. If it is a grouped image, you need to put a transparent square or circle using the shape tool and link to that.
and type in or paste the URL. If it is a grouped image, you need to put a transparent square or circle using the shape tool and link to that.
 Use your image
If you are using your image for a digital escape room and you are putting it in Google Sites, just insert the drawing inside Sites.
If you are using Sway or a website, you need publish it (Slides or PowerPoint only) to the web (see Sway tutorial) and get the embed code.
You can also download the image as a .jpg or .png and use it as just an image. You will lose your hotlinks but it’s still super cute for newsletters and Google Classroom headers (set size to 1000 x 250 px before you begin)
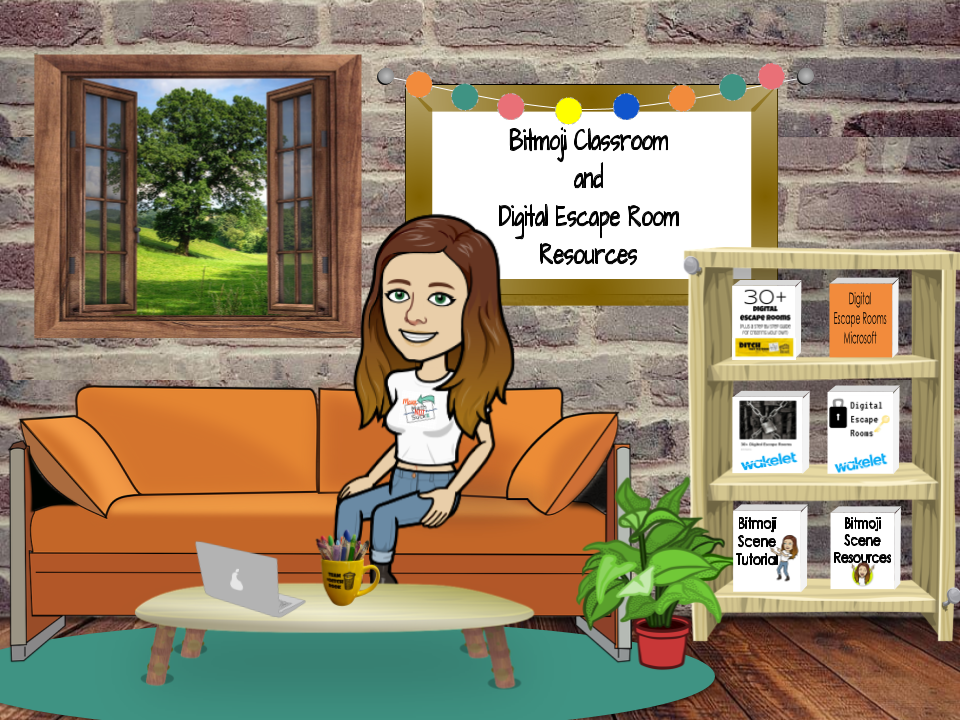
Here is my completed image. The books on the shelf are are clickable links.
Wakelet of Resources Tutorial to Create Your Own Images

If you’ve been around the blog for awhile, or follow me on Twitter, you know my love for all things Google. When I created my tutorial for Digital Escape Rooms (posted on Ditch That Textbook) it was using all Google apps.
I know some fellow educators out there are not in a Google school. Other educators are Google schools but they can’t use Google Forms. Never fear, here is a tutorial to create a digital escape room using Microsoft Sway, PowerPoint (or Google Slides) and Forms.
The process is the same except for the location of the image and the last step and you can even use Matt’s planning template.

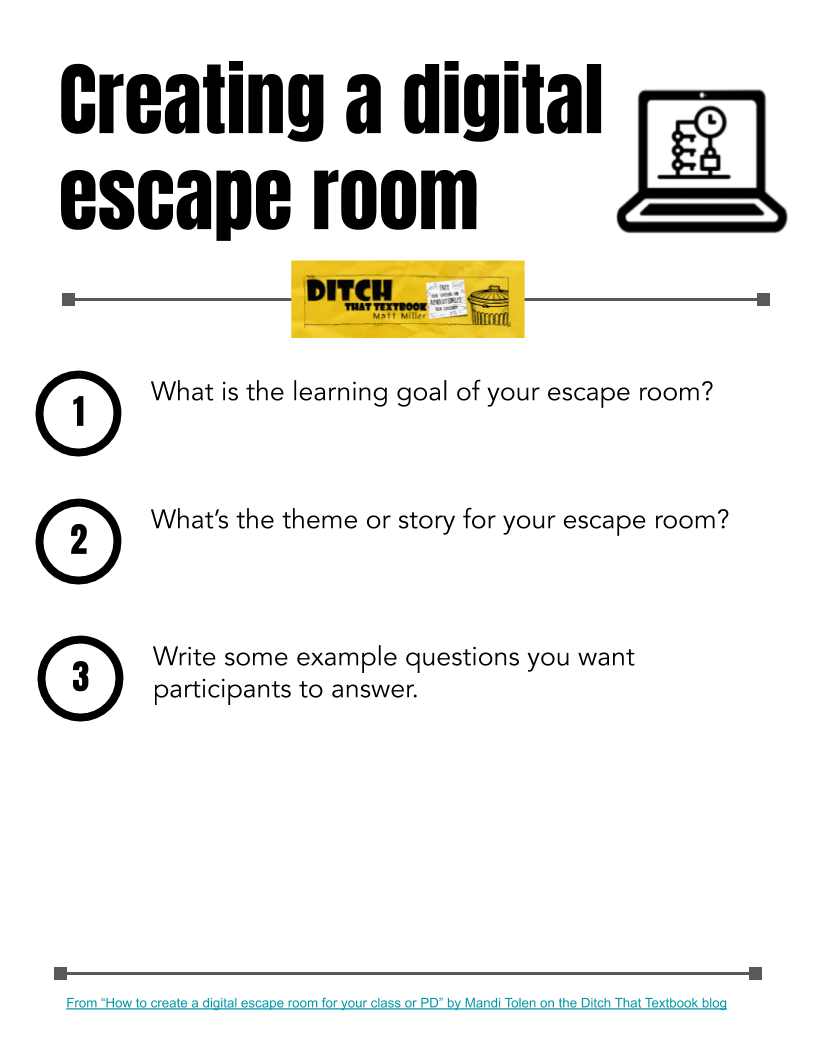
You need a good story to hook the audience. When you go to a physical escape room, they set up the situation with a story or information at the beginning. The purpose of this Halloween themed digital escape room was to share some tech ideas with my staff in a fun way.
So I wrote an introduction to tell my audience what was happening:
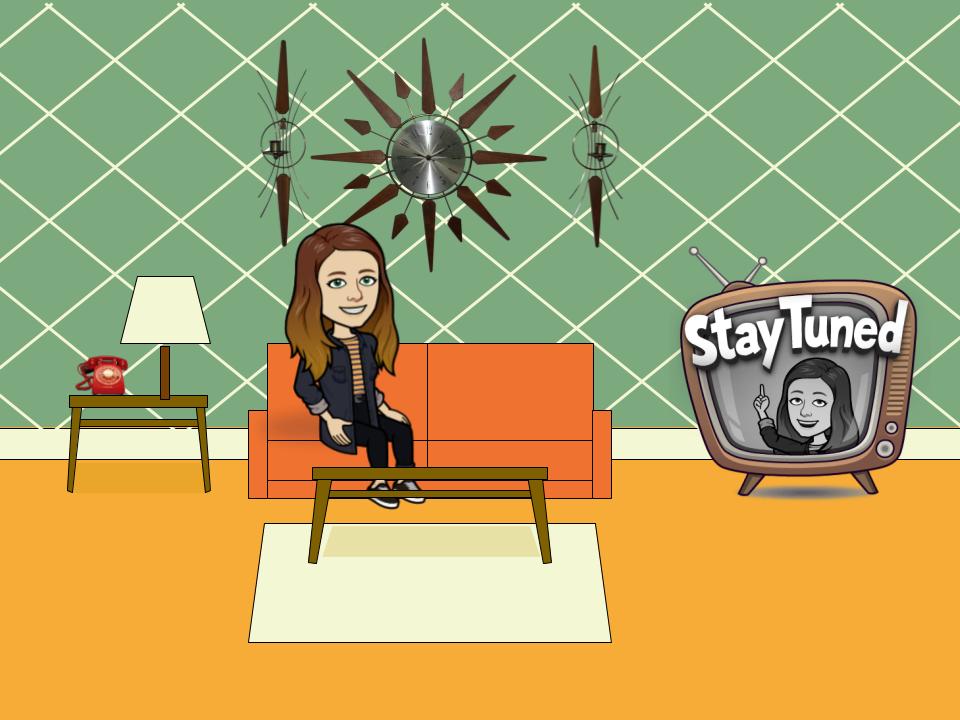
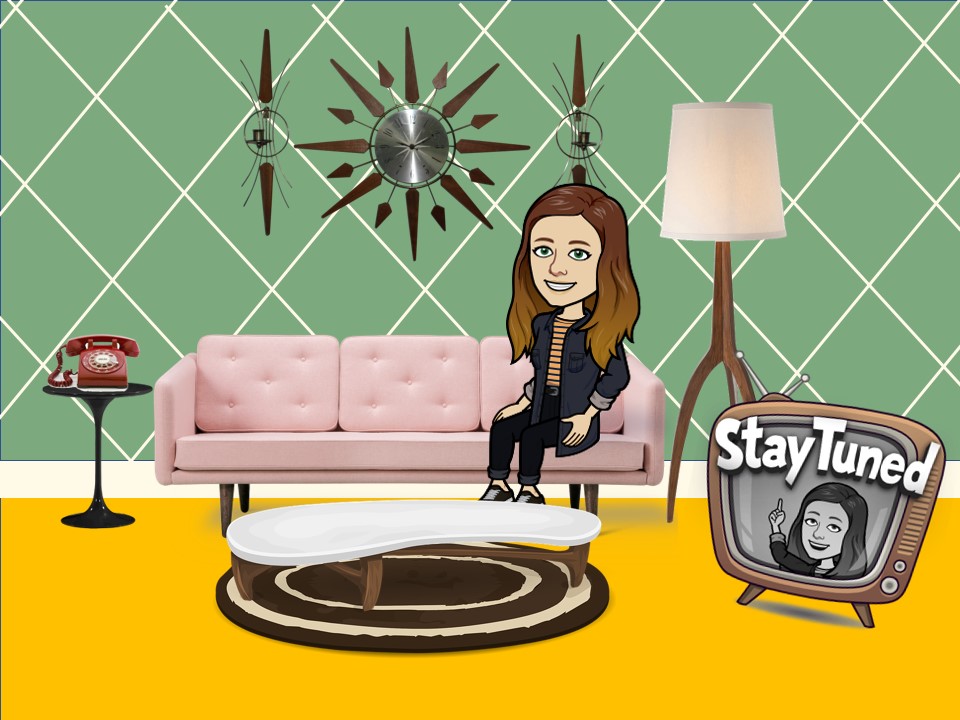
“It’s a blast from the past! But when I blasted from the future to my 50’s living room, I lost my copy of Ditch That Textbook. Click on the clues in the room to help me find my signed and treasured copy.”
Determine how many and what kind (number, word, etc.) of clues you want. I want this escape room to be a fun activity for teachers to do as stress relief at the end of school and maybe gain some inspiration for next school year. During this step, I also created all of my clues. Some are in PowerPoint, Docs, Excel, Jigsaw Planet, etc. I keep all of these in a folder in One Drive so everything is together.
Here is a Wakelet collection with even more clue making resources.
I almost always have an interactive image that I create in Google Drawing. But to embed in Sway, you have to use used something with an iframe embed code. I know, what the heck is that. No worries, I’ll walk you through it later. In the mean time, use PowerPoint (or Google Slides) to create your image. We will embed this in our Sway at the end and the links or “hotspots” will remain active.
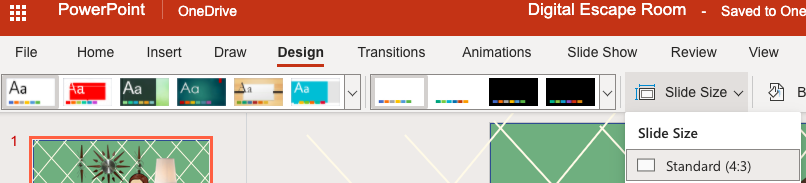
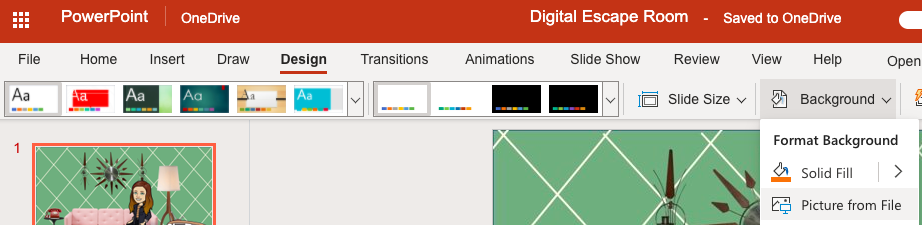
Open a new PowerPoint (or Google Slide) and start creating your scene. I changed by screen size to 4:3. You do this under the design tab, then select slide size.
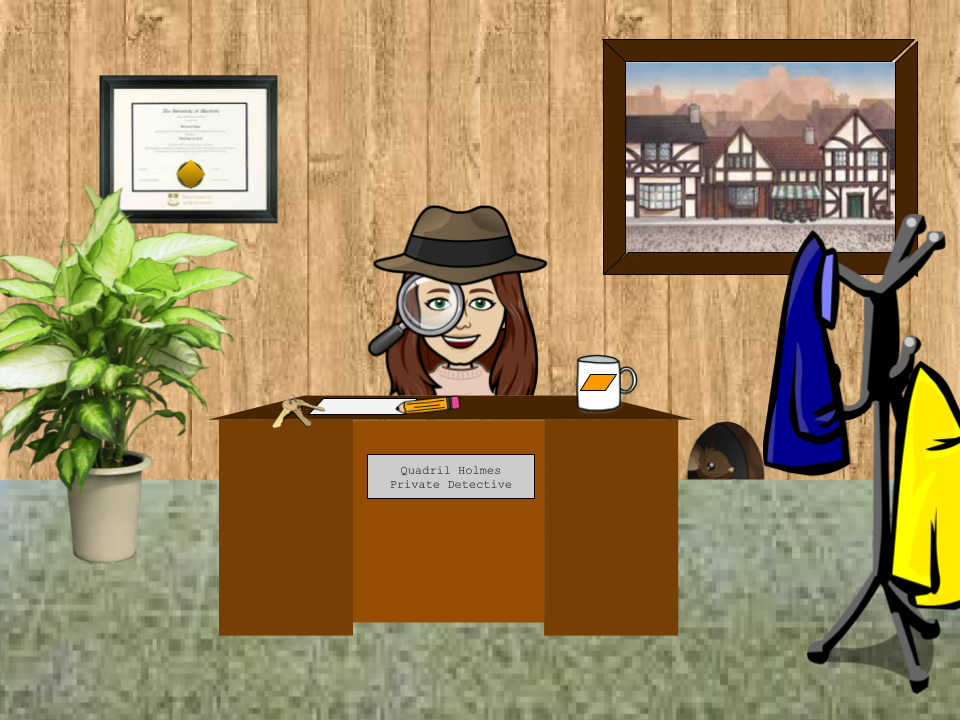
It can be as easy as a single image (the reindeer in this Reindeer Games digital escape room), or as fancy as a full scene (like the image below).
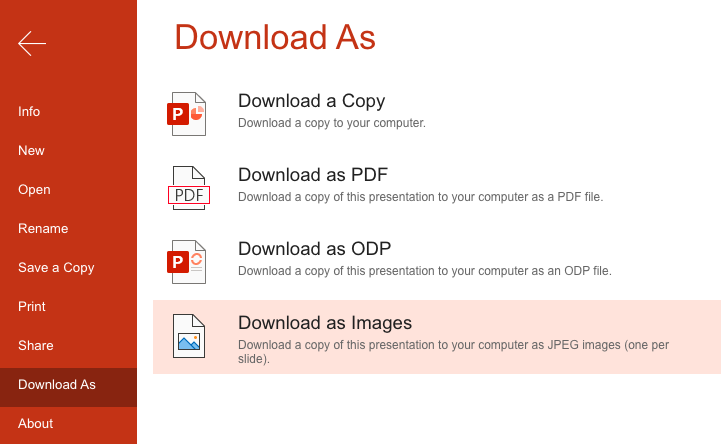
Once your image is created, you may want to download this and set it as your background. This prevents you from accidentally moving one of your components while setting your hotspots. To download the image, click on the File, then download as images. This will make a zip file. You will have to unzip it (double click usually) to use it. Once you have the image, then click on the Design tab and choose Background, picture from file. Navigate to you photo and upload it. Don’t forget to select all and delete everything from your page (it’s scary, I know, but you have an undo button). You will see your image set as the background.
After your image is created and set as your background, you need to link your clues to each object. I have 5 clues, so I linked it to the clock, phone, tv, coffee table, and pink sofa.
You can make anything you added to your image clickable as a link! PowerPoint 365 is a little different than Google Slides. You can use a shape or textbox for this next step. If you use a shape, set it to no fill and no outline. If using a textbox, delete the text. Double click on the shape or click on the textbox and go to the insert tab and choose link. ![]() Type or paste the URL for the clue you are linking. To prevent the text from showing I use a period and change it to the color of the object it’s over. If you are using anything cloud based, make sure share settings are set for anyone to be able to view.
Type or paste the URL for the clue you are linking. To prevent the text from showing I use a period and change it to the color of the object it’s over. If you are using anything cloud based, make sure share settings are set for anyone to be able to view.
If you are using the desktop version of PowerPoint, you can just right-click on the shape you drew and add your link. It’s much easier on the desktop version. You will have to your PowerPoint to the One Drive cloud to get the embed link.
Some breakouts may have more than one image or page. In my trianglesonly.com breakout game, I had multiple pages on the top tab to replicate a dating site, so I repeated the process for each image I created.
If all of your clues are numbers and you have the pro version of Microsoft forms will can create your locks in Microsoft. You can create create a cypher for each clue to change it from letters to numbers. I show some examples in this escape room. You can make your Cypher images in any image editing program. You can also use PowerPoint and download the files as .jpg or .png.
I don’t have the pro version of Microsoft Forms so I’m using Google Forms. Create a new Google Form (I keep everything for each escape room in one folder). You want to use response validation (check out this video for a walkthrough on how to add it) so they have to type in the correct clue. You also want to make the question required.

For number locks, I use the number is equal to setting then type in the number you want. You can also type in a custom response if they get it wrong. For a number, I usually just use “try again”.

For letter locks, you will select text contains. Forms are case sensitive so my clue usually directs them to capital or lowercase letters.

Continue this process until you have all of your clues entered.
I like to include a special message or image once the person “escapes”. To do this, create a new section in your Google Form.

On this new page, you can post a message or an image congratulating them on escaping.

In my opinion, this is the most exciting part of the process. This is when everything you have created comes together as an escape room.
Got to sway.com and start new. A title card will always be the first card offered. Title your Sway and add any images you wish. There is a design tab if you want to play around.
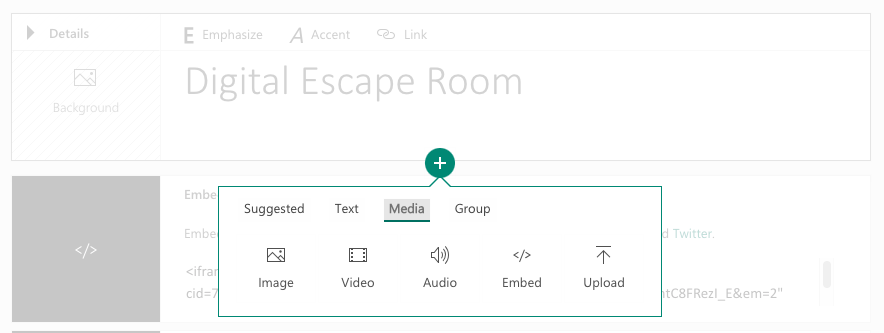
Now add you image (or images). Click the plus sign, then the media tab, and then embed.
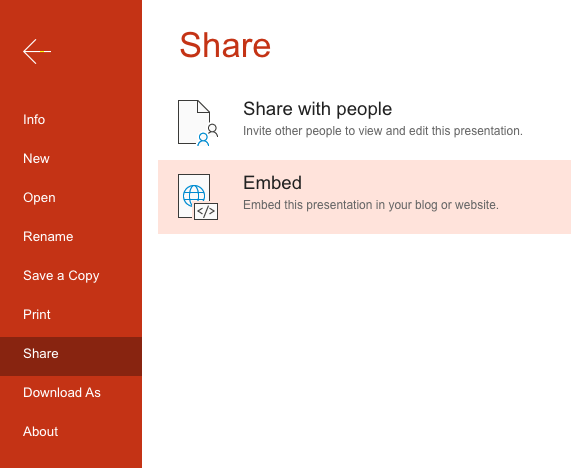
Now let’s go get our embed code. Your image is in PowerPoint (Google Slides instructions will be below). In PowerPoint, click file, share, and embed. Copy the embed code.
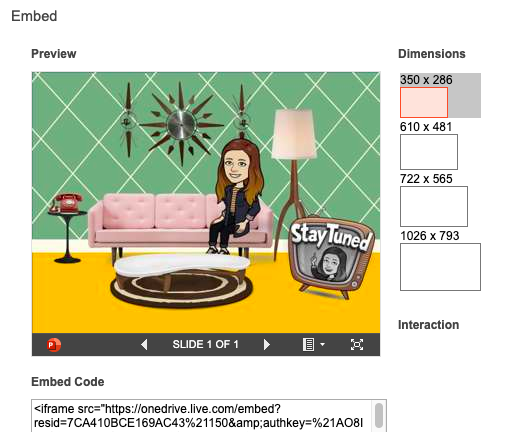
Head back over to sway and paste the embed code in the card.
Google slides will need to be published to obtain the embed code. Go to File – Publish to Web. When you click publish, an embed code will be available.
Now let’s insert our Form. Whether you use Microsoft or Google, the process is very similar. Click the + in Sway and select Embed again.
Go to your Form. Click Send then the <> tab to get the embed code. Paste this code in the Sway card.
Now you are ready to preview your Digital Escape Room. Click the play button in the top right corner. How does it look?
When you are ready to share with others, you use the share button. You can copy a link or create a QR code.
Whew! You made it to the end. Now you are ready to go create your own Digital Escape Room with Sway.
You can try out the Digital Escape Room created during this post with the link below.

I wrote a post a few years ago about creating digital breakout games. You can view that post here. Quite a few things have changed, so a new post was in order. Matt (@jmattmiller) was kind enough to let me be a guest blogger on his site. He also added a sweet planning guide to help you with the process. Head over to ditchthattextbook.com and check out the post.