I know it’s been awhile since I posted, but I didn’t want to miss Tech or Treat this year. I hope you enjoy!

adventures in the math classroom

I know it’s been awhile since I posted, but I didn’t want to miss Tech or Treat this year. I hope you enjoy!

I has hanging on Teacher TikTok and saw this idea from @emily_karst. My head nearly exploded! I love when I see new things for the first time!!!
This quickly creates gifs from youtube videos.
Step 1
(assuming you already have your video selected)
Type GIF before the word youtube.
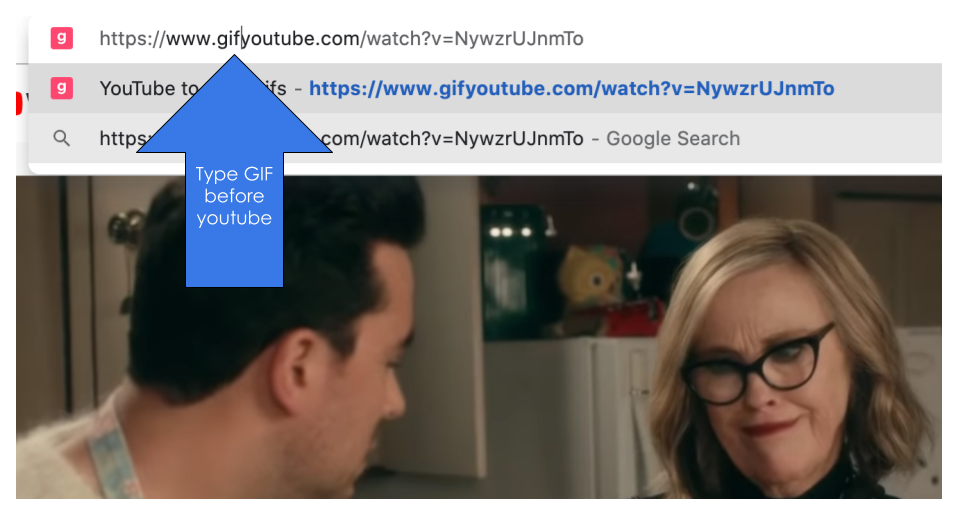
Step 2
Press enter and a new website will open and your video will load.
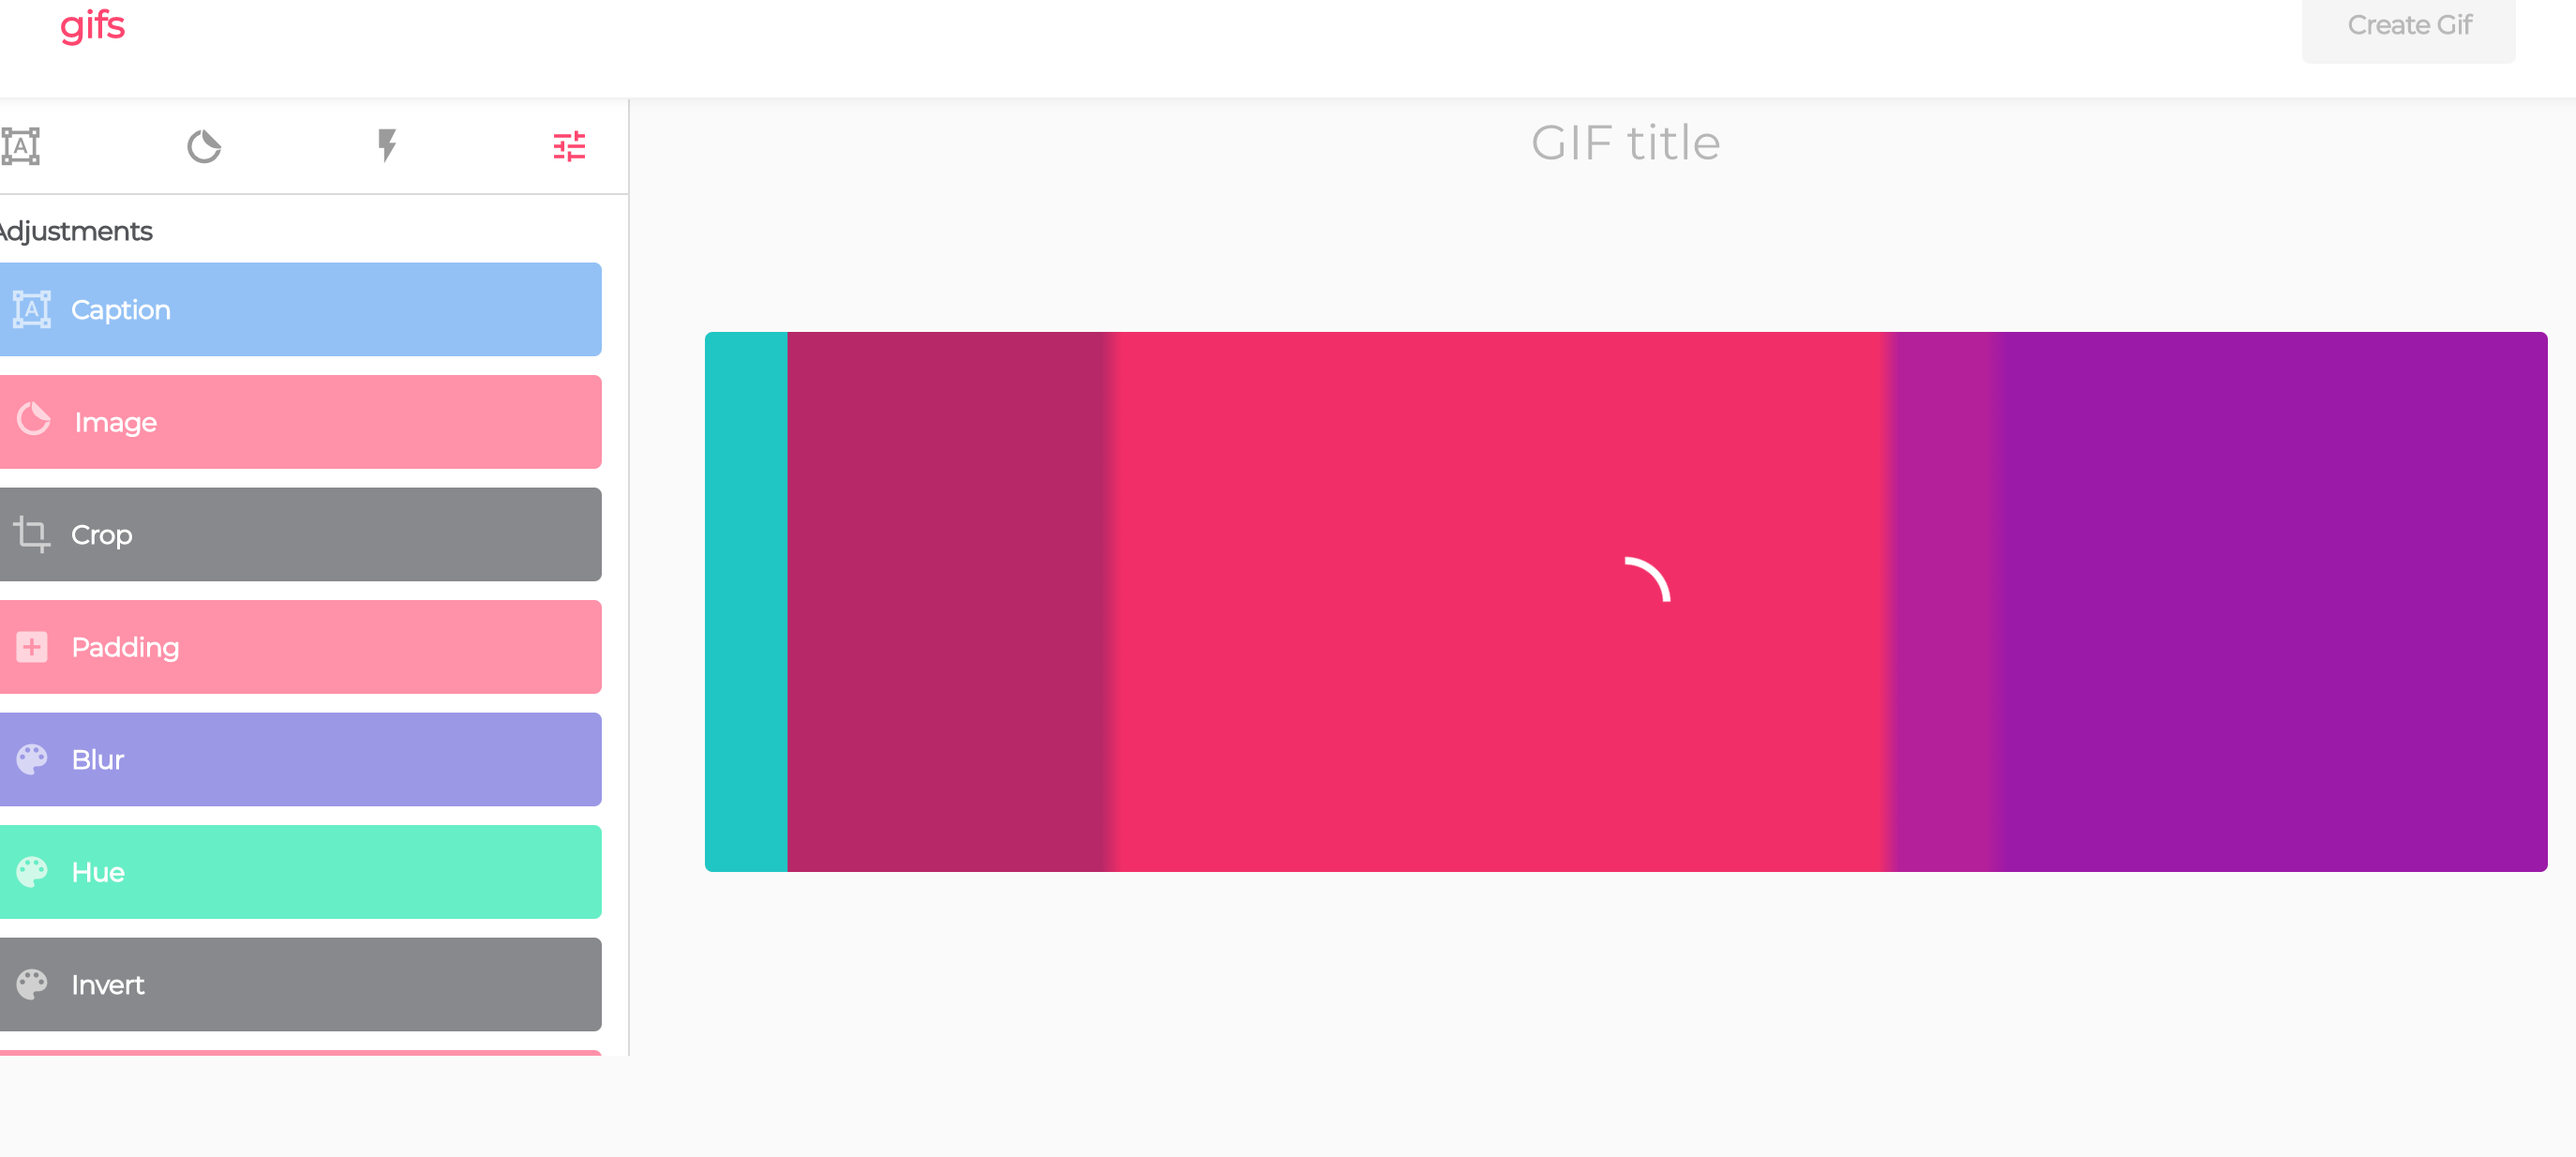
Isn’t the website color palette sooo cute!
Step 3
Select the clip you want as the gif by dragging the box at the bottom. You can preview it and move it again if it’s not what you wanted.
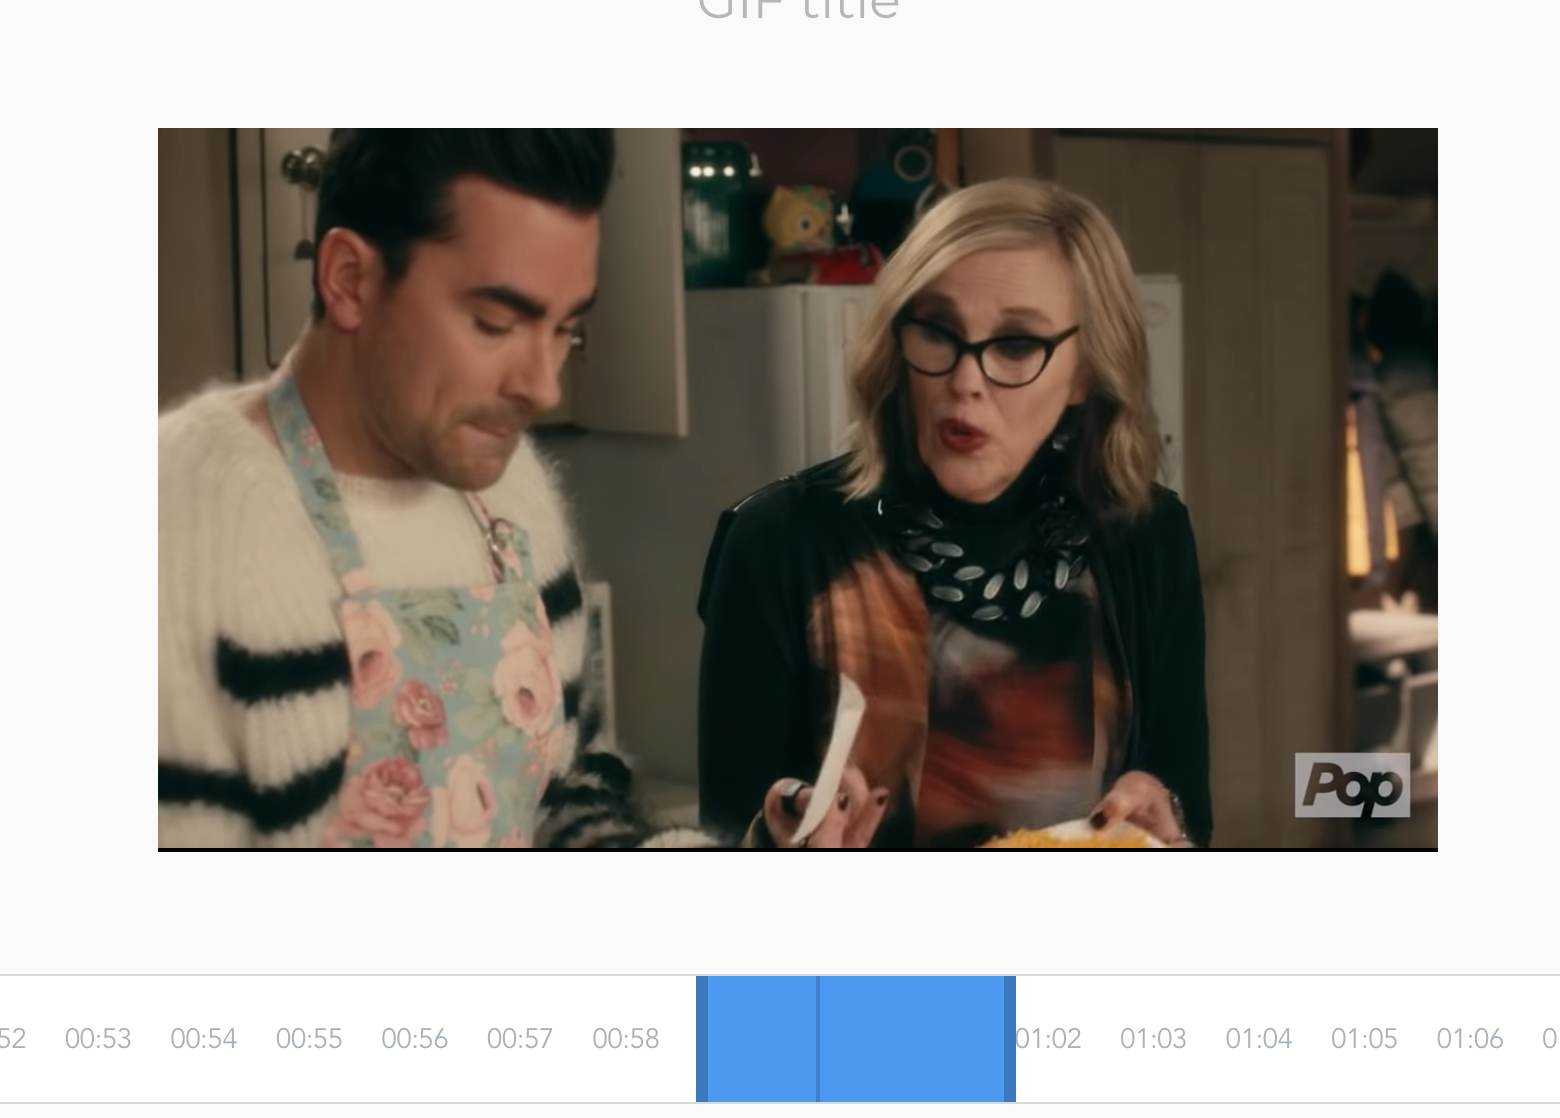
Step 4
Click Trim Video in the top right corner.
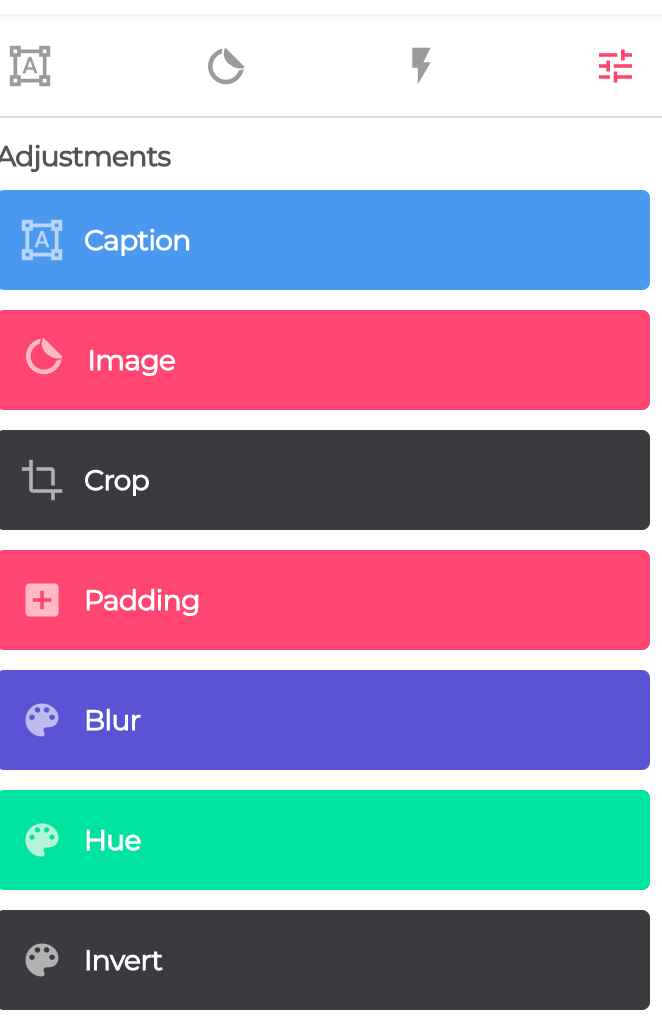
Now you can add text, graphics, or any of the adjustments.

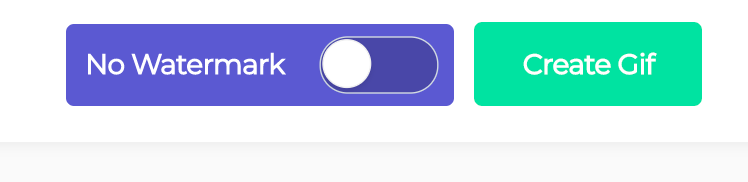
Step 5
Click create gif in the top right corner.
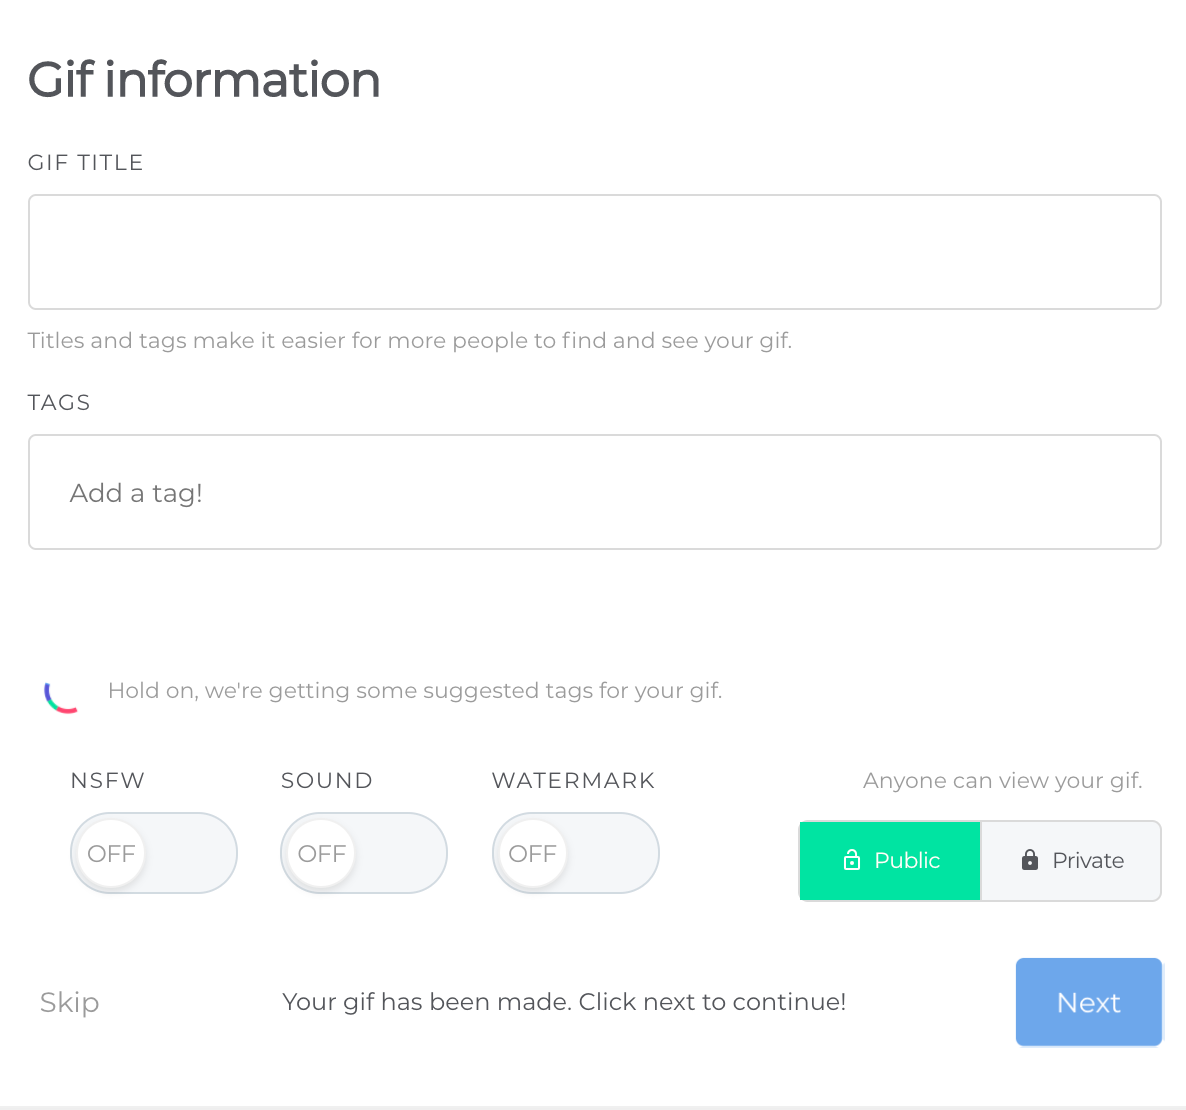
You can add tags etc if you want to. I love that you can include sound.
Click next.
Step 6
Share it!
You have many options to choose from including download.


And there you have it! Why did I pick this GIF? This is how I feel when I’m asked to implement something new and I ask for clarification. Reflecting on this, I try to be aware when I teach so I don’t tell them to just FOLD IT IN. LOL
This is more fun and less educational but we need fun sometimes!!!

The 12 days of Techmas was such a hit last year I made one for this year. Even though it says Techmas, I tried to keep this holiday neutral to include all of my educator friends.
Check back every day and a new snowball will appear. Click on the snowball for the snowman’s gift!
I hope you find something new to make your job easier or learning more fun for students. Have a wonderful holiday!

This is a post for my remote teaching friends or even my friends who are in person but don’t want to touch papers. It’s a scary time we live in and the less we touch the better.
During emergency remote learning in the Spring, I had students send me images of their work. Many of them were HORRIBLE. They would send a picture taken from the side with mostly their bed and pillows in the background, dark or blurry pictures that you couldn’t read, or the HEIC image format that couldn’t be uploaded.
I didn’t want a repeat of the spring so I did some research and found Apps that would work on most phones. I created tutorials for each and I also screen shared my phone during Zoom sessions and demonstrated how to use these apps.
Reasons to Scan vs. send pictures:
Notes App (iPhones)
This app is standard on the iPhone. It will only save as a PDF but you can choose color or black and white.
Genius Scan
I have been using this app for a few years now. I LOVE this app and have shared it with my colleagues. You can send the image as a PDF or .jpg and it’s available for free on iOs or Android. I still use this app even though Notes will now scan.
I created a tutorial slide for my students with some additional information. The template is from SlidesMania (of course!). Feel free to use it with your students if you find it helpful.
I shared the scanning idea on Twitter the other day and received a lot of requests for more information. I though a blog post would be the best. Hopefully it helps make remote learning a little better for you.
Stay safe friends!

If you didn’t know, I am a HUGE fan of Wakelet. See, I was at the very beginning of the Pinterest craze all those years ago because I LOVED the visual aspect of storing my bookmarks. Wakelet hits the visual aspect for me too but it’s easier to share with others and it can be COLLABORATIVE.
Chrome extension
I love the Chrome Extension for Wakelet. If I’m on a website, I can click the W in my extensions bar and it will open a save to Wakelet window! So easy, just like the save to Pinterest button that I love so much!!!
I love when I’m on my desktop version of Twitter (and the Chrome extension is enabled) that I can hit the W and save a tweet. When I’m on my phone, I hit the up arrow and save to Wakelet. Also sooooo easy!!!

Wakelets can be public. If you click on this link, it will take you to all my public Wakelets.
BUT, you can also may them private! This is perfect for student work. The private links are sharable, and only the people you share them with will see them. It’s a great way to share student work with the class and their families.
Wakelets can also be collaborative. You can assign each student a topic and they can add to a shared classroom Wakelet that is private to everyone except your class.
Spaces
This week, Wakelet released a new feature called Spaces. Basically, it’s a Wakelet full of Wakelets. Why would you need this you ask? Well, here are a few examples I have created just this week.
Digital Escape Rooms – I had 3 different Digital Escape Room Wakelets on my site. One was the escape rooms I have made, another was resources to create your own, and a third was escape rooms others had made. I had to share all three of them when I talked about escape rooms. NOW, I can just share the space will all my Wakelets inside.
Desmos Resources – We are always finding Desmos resources. I was just saving them to a Wakelet called Awesome Math Ideas. A few colleagues of mine ALSO have Desmos ideas saved. To make the process better, I made a Desmos Space and we have our 4 content areas in it. It’s now collaborative so we can all add what we find. This is going to be WONDERFUL!
So what can YOU do with Wakelet Spaces? I’m so glad you asked. Here are a few ideas, in addition to what I’ve shared above.
What will you do with Wakelet spaces? Tag @Wakelet and @MandiTolenEDU on Twitter if you use Spaces in your classroom. I would love to learn some new ideas from you!!!

Most of the content in this post is similar to the original post. You can view it here. I’ve learned a little since I created that first post so now the process is better and it’s possible to update the content once you make. If you don’t want to create your own from scratch, Matt Meyer (@54Mr_Meyer) has created templates that are available on Slides Mania.
I REALLY dislike cutting out paper activities. This dislike is what prompted me to create my first activity (drag and drop Geometry Proofs) with technology. When my team found a fun Memory Game activity I CRINGED at the thought of cutting out all of those sets and then finding a place to store them.
 I went through a few attempts to create a memory game in Google Slides. I thought about linking pages but I needed to see two at a time. I wanted to remove one element “on click” but I could only get them to dissolve in a specific order. I settled on deleting the cards and it worked like a charm.

I know, you are all wanting to create your own memory game now! You’re in luck, I have a quick tutorial for you!
 We are going to use the Master Slides to create our content (the back of the cards). This will prevent the movement of the content when players remove the top card. Using the Master Slides will also make editing possible should you wish to change this activity in the future. The way I suggested to do this before would not allow that.
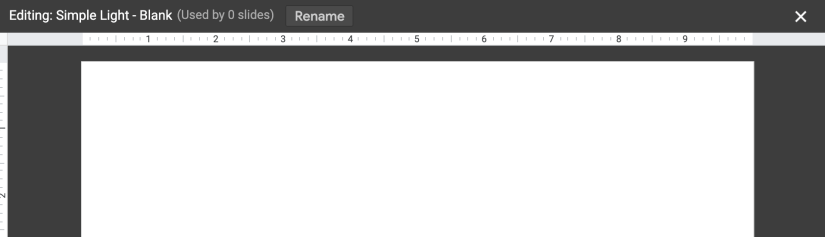
Here is how to access Master Slides. You will scroll to the bottom and use the blank slide.

I used the basic white background so it didn’t distract from game. Place all of the “back side” of the cards, the part with the content, evenly spaced on your Master Slide. I ended up putting boxes around mine to help me get them spaced. I love that Google Slides give you guide lines as you place your items.
You can also use the arrange menu and select horizontal or vertical and align them perfectly.
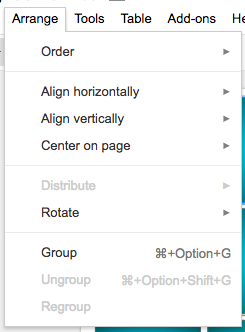

Now we will close the Master Slides menu by clicking the x in the top right corner.
Once Master Slides closes, you should see your blank slide. You can right click (two finger click) on the blank slide and Apply Layout, selecting the layout with your content. You should now see your content you created earlier displayed in the slide.
 We are ready to make the cards. I used the rectangle shape and held down the SHIFT key to make sure I had perfect squares.
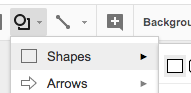
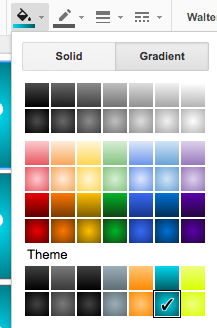
I used the gradient tool to select the background and put a ? on it just like the original memory game.
 One suggestion from my students was to make this an image so the ? wasn’t editable. Sometimes when clicking on the square they got the ? instead.
You could make these cards in Google Drawing and download it as a PNG to use in the game.
You can copy and paste these and use the align tool again to get them close to where you want them. Then move them exactly where you need them.
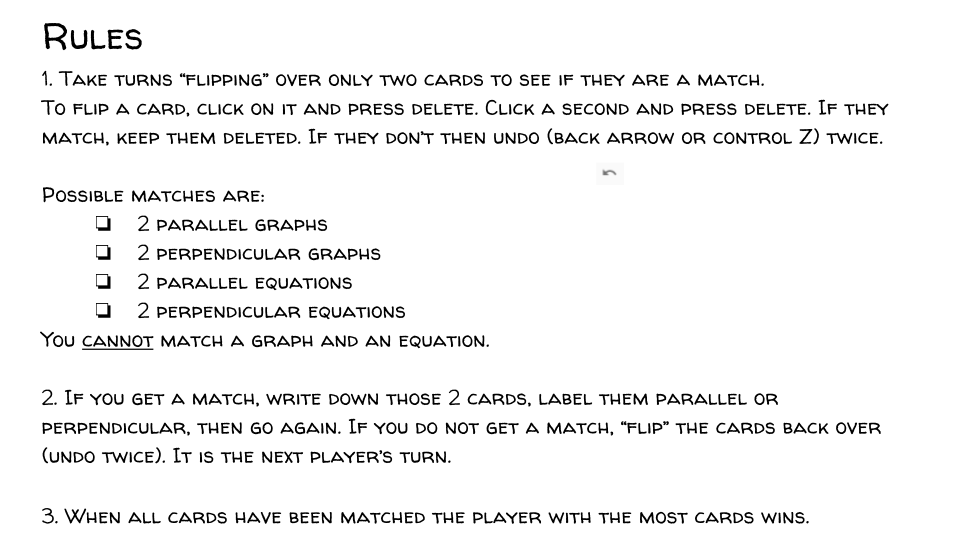
 Create the rules page. I’ve included the image of my rules page below. It explains how you would “flip” the cards over to play the game.
A question I get a lot is how to flip over the cards. You aren’t REALLY flipping over the cards, you are deleting the cards to reveal the content behind it. You delete 2 cards. If they are a match they remain deleted. If they are NOT a match, you undo twice using control Z or the UNDO arrow and the next person takes their turn.
 Play the game!
I sent this to my students through Google Classroom and said make a copy for each student. They enjoyed it and learned from the activity as well.
If you make a memory game, please share! I love to see how people use my ideas.
Tag me on Twitter @MandiTolenEDU and use the #infinitelyteaching. If you want to use Matt’s template, head over to SlidesMania and snag it.

I LOVE GOOGLE DRAWING!!! If you’ve been around here for awhile, you know how much I use Drawing or Drawing features in slides. That’s right, Google Slides uses many of the same features as Google Drawing. WIN!
Google Drawing will download as a transparent .PNG image. It’s vector based, so if you make a large image it will scale without much degradation of the image. I once create panels for a tri-fold display board, printed them and glued them to the board. The images were crisp and looked professional.
This is a little tutorial to help you get started with Google Drawing.
Come back soon and we do something FUN with Google Drawing and Google Slides.
I REALLY dislike cutting out paper activities. This dislike is what prompted me to create my first activity (drag and drop Geometry Proofs) with technology. When my team found a fun Memory Game activity I CRINGED at the thought of cutting out all of those sets and then finding a place to store them.
I went through a few attempts to create a memory game in Google Slides. I thought about linking pages but I needed to see two at a time. I wanted to remove one element “on click” but I could only get them to dissolve in a specific order. I settled on deleting the cards and it worked like a charm.
I know, you are all wanting to create your own memory game now! You’re in luck, I have a quick tutorial for you!
I used the basic white background so it didn’t distract from game. Place all of the “back side” of the cards, the part with the content, evenly spaced on your background. I ended up putting boxes around mine to help me get them spaced. I love that Google Slides give you guide lines as you place your items.
You can also use the arrange menu and select horizontal or vertical and align them perfectly.
This is probably the most important step. We don’t want the background to be deleted while we are playing the game. Once you have the “back side” set exactly as you want it, go to file – download as – and pick jpg or png. 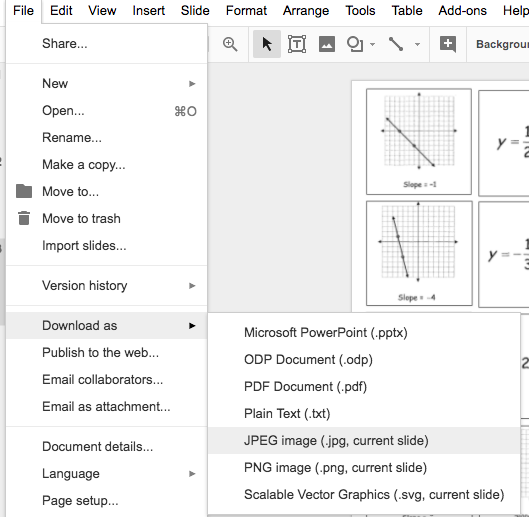
Once it’s downloaded, delete all of your elements. I know, that’s scary. I do go into my history and set that version as editable background, you know, just in case you made a mistake.
Now you will set this as the background. There is a background button on the top middle of the menu bar. Once you click it, select your image and set as the background. Now you can breathe again. All of that work is still there, not gone forever!

We are ready to make the cards. I used the rectangle shape and held down the SHIFT key to make sure I had perfect squares.
I used the gradient tool to select the background and put a ? on it just like the original memory game.
One suggestion from my students was to make this an image so the ? wasn’t editable. Sometimes when clicking on the square they got the ? instead.
You can copy and paste these and use the align tool again to get them close to where you want them. Then move them exactly where you need them.
Create the rules page. I’ve included the image of my rules page below. It explains how you would “flip” the cards over to play the game.
Play the game!
I sent this to my students through Google Classroom and said make a copy for each student. They enjoyed it and learned from the activity as well.
If you make a memory game, please share! I love to see how people use my ideas.

If you’re not familiar with Bitmojis, YOU ARE MISSING OUT! It’s you in an avatar with a ton of different sayings and situations. It’s an app you can download (iOs & Android) and a very user friendly Chrome extension.
It is fun, but it also has a TON of applications in the classroom. Since it integrates with Chrome so well, you can drag your bitmoji into most Google Apps as feed back for students.
Sometimes my students leave me “suggested” feedback through Bitmojis as well. 
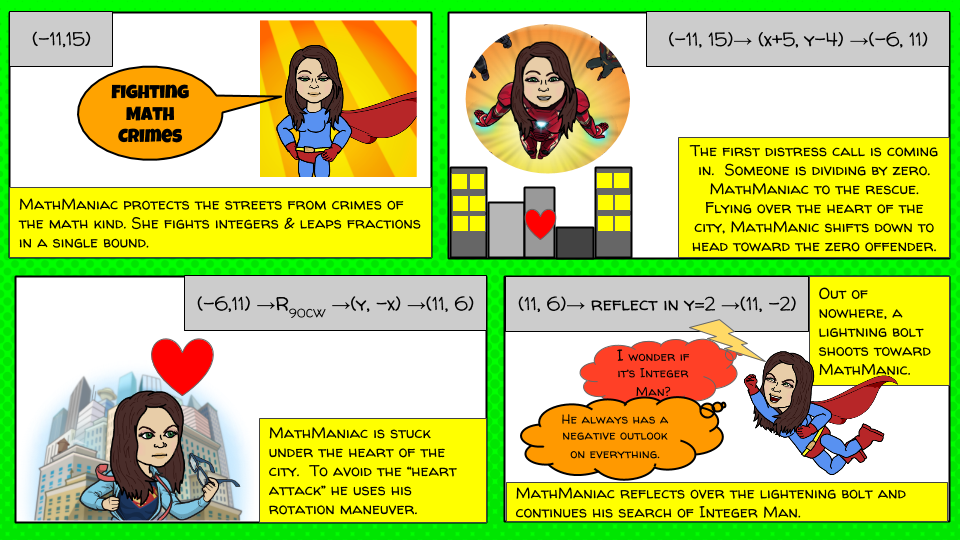
I recently used Bitmojis to enhance my Superhero Transformations activity for Geometry. It was a HUGE hit!
This idea came from a discussion with the AMAZING Sylvia Duckworth. I’ve included her slide deck full of ideas as well. My example is on there but so are a ton of other amazing examples of how to use Bitmoji comics.
Here is the example I gave my students. We also had a quick exploratory lesson about how to transform the Bitmojis through the arrange menu (or 2 finger click or key command) and a quick lesson on how to crop and mask images.
I was even more impressed after my students submitted their projects.
Example 1 Example 2 Example 3 Template to create your own (make a copy to edit it)
I created some examples for my non-math friends when I presented this to my school. How about a comic in a foreign language, or a political cartoon?


Now if you are a fan of Snapchat, you probably already know that Bitmojis are sticker options inside of it. You can also send “together” bitmojis in a message.

Tara Martin shared her idea about using Snapchat and bitmojis with book selections and a new hashtag was born – #booksnaps. You take a pic of a book selection you like, annotate & add your bitmoji. Read about it on Tara’s blog here.
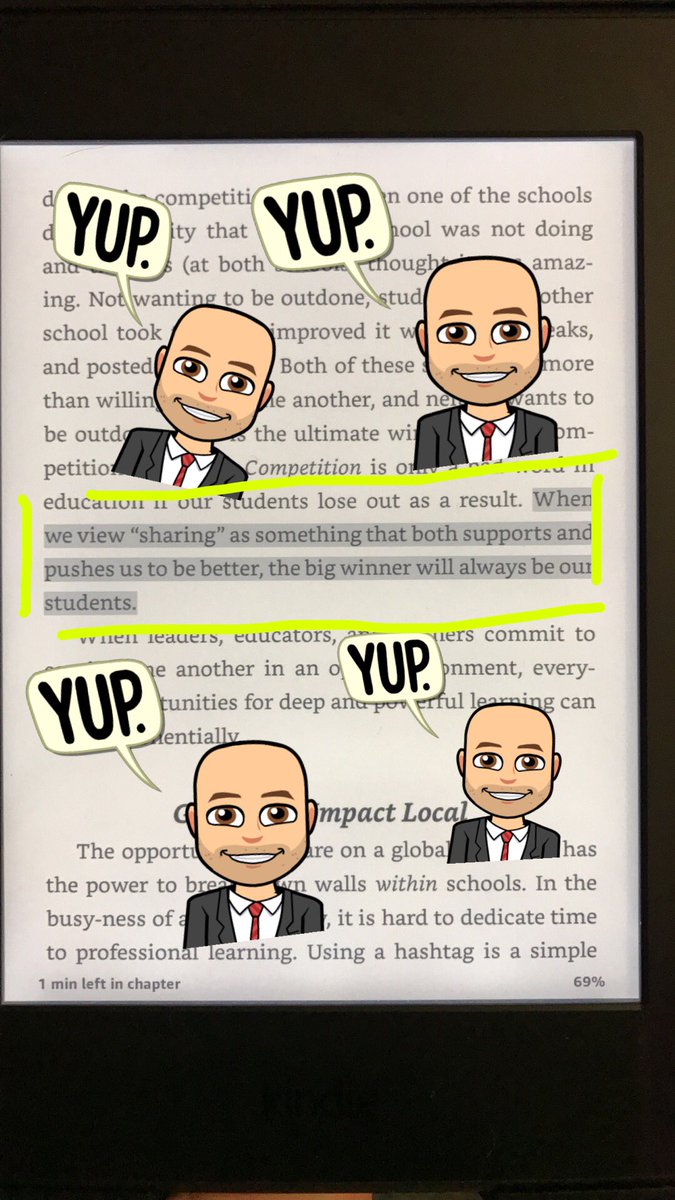
#BookSnaps @gcouros #InnovatorsMindset pic.twitter.com/aIkZY7URh2
— Mr. Titmas (@sdtitmas) November 12, 2016
And if you don’t want to open the world of Snapchat in your classroom, this can be done through Google Drawing or Google Slides.
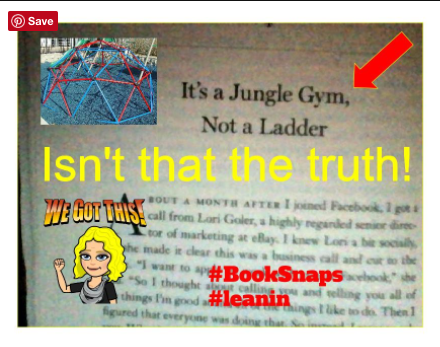
Made #BookSnaps w/ Google Drawing b/c we have Chromebooks. Might work? Any ideas? #tlap @TaraMartinEDU pic.twitter.com/6AGZNDORup
— Alethea Vazquez (@teachergal02) November 11, 2016
A quick disclaimer on Bitmoji, there are a few that are not school appropriate. This isn’t any different from anything else you find online. Talk to your students about using Bitmoji responsibly and open up a whole new world for them.
Follow me on snapchat if you would like. 

Choose Your Own Adventure was such a success in Algebra that we wanted to try it in Geometry. This served as our unit 7 assessment. We followed the same process that we did here but I did update the process so students could plan electronically using this planning form. I also had students create this in New Forms so the process is slightly different than my original post.
The biggest difference between old Forms and new Forms is inserting a page compared to new section.
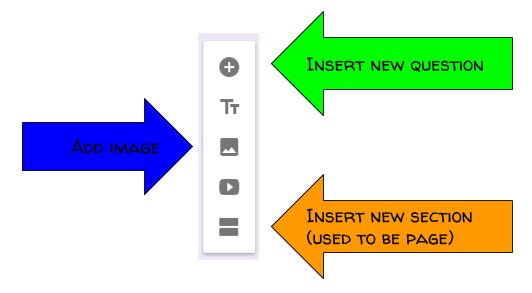
We also used Google Drawing so students could create their geometry problems using tangents, secants, arcs & chords. Many students had never used Google Drawing and they were very excited how nice their images looked.

Students had to get 3 peer reviews, which meant a student worked through their adventure, correct and incorrect answers, then gave feedback on improvements. They used this document to guide them through the peer reviews. The result SHOULD have been a product that met all of the requirements. Some students don’t peer edit as well as other but they learned quickly that being NICE doesn’t help you improve.
Here are a few of my favorite projects. I told them I wouldn’t publish them unless they were correct. 🙂