

*Updated 9/2021*
Self-Checking activities are very common in my classroom. I have used them for remediation days, for review days, and as a check your understanding right after a lesson. I shared the Mystery Picture idea from Jason Pullano that can also be used as a self-check activity. Now, I want to take the Pixel Art idea shared by Alice Keeler and turn it into a self-checking activity.

You will want to have your questions and answers prepared and have an idea of an image to use. You can go as in depth with your image as you wish. I prefer to keep it simple and build upon a background image. For this tutorial, I’m going to use a simple snowman on a light blue background. You can do a full image like these examples if you are ambitious.


Prepare your Google Sheet by making your cells into squares. We will merge cells together to write our questions so no worries. Make the squares as small as you need them for your image. The left side is where my questions will go. The right side is where the image will appear.


Now put your questions into the Sheet. You will merge cells to allow room for the question and NOT distort the grid for your image. I put my answers in also. You can delete them once the activity is complete.
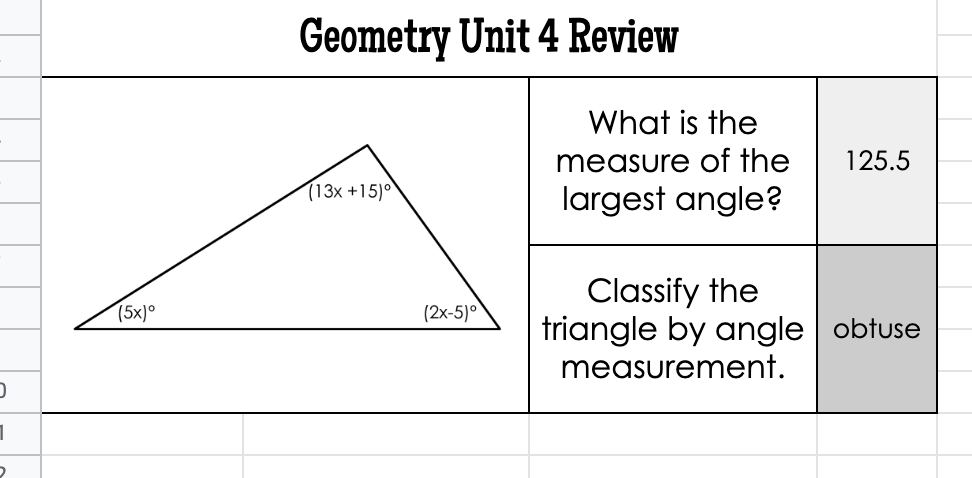

Now we will start our design. I am NOT a Google Sheets expert. There may be an easier way to do this but this is how I do it. I use 0 and 1. 0 when the answer is blank or incorrect and 1 when it is correct. You can change the color of the numbers so you don’t see them. I will start with my first question and my first black block.


*Update*
You can also add a sheet 2 in the bottom left corner & type your answers into Sheet 2 to prevent students from seeing the answers. So let’s say this answer is in cell B2 in Sheet 2. I would type
=if(D3=Sheet2!B2, “1”, “0”)
*end update*
D3 is the cell with my answer and 125.5 is the correct answer. “1” will return a 1 if correct and “0” if incorrect.
Now copy and paste this formula in every other box that should be black. I will set the color in the next step.

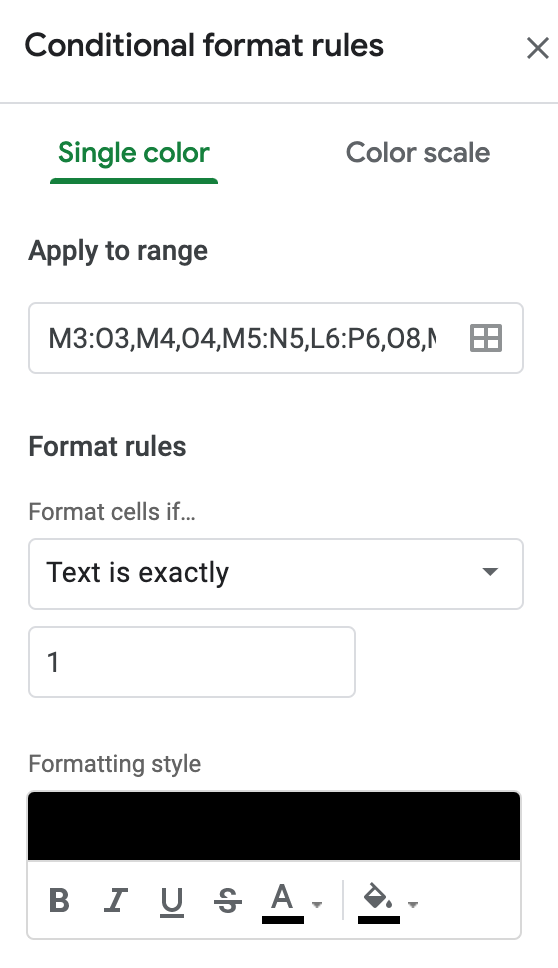
Now let’s change the color of these 1s. Click on ALL the 1s you have on the screen (hold down the command key on a Mac -IDK for Windows – sorry). Go to Format – Conditional Formatting.
Change the Format cells if… dropdown to “text is exactly” and then type 1. Pick your color and also change your font to that color.
Repeat steps 4 and 5 until you have all colors on your screen.


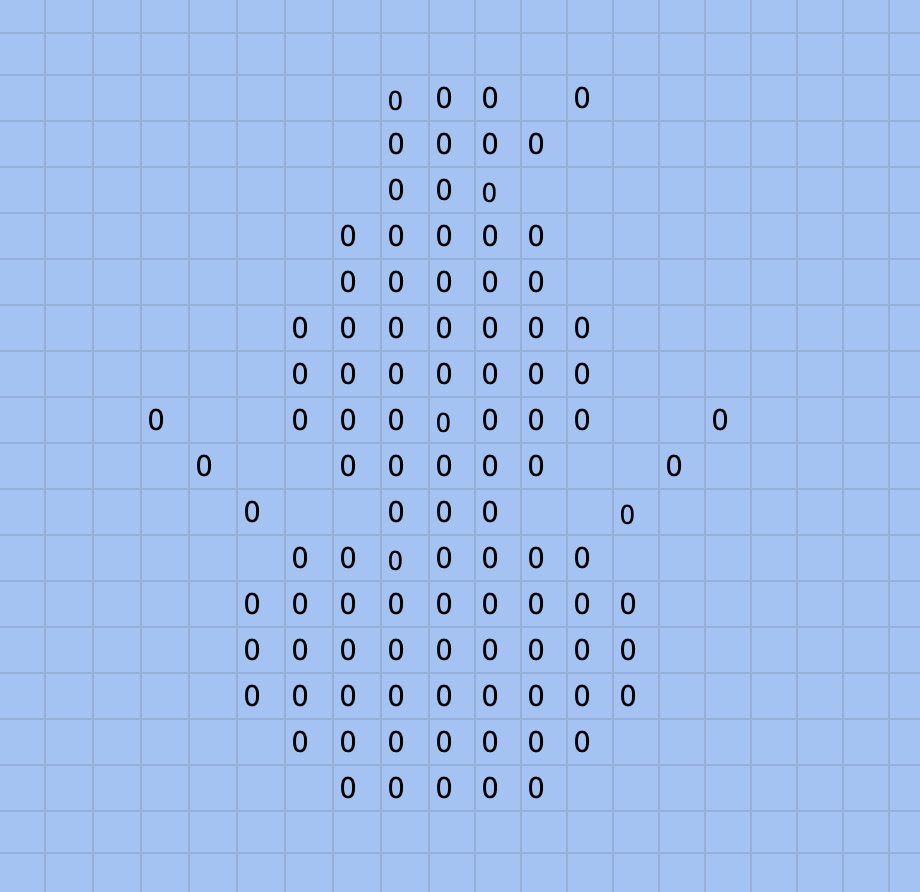
Now it’s time to delete your answers in the boxes. When you do this, your 0s should appear. Once you see all of you zeros, change the text color to white (or blue in my case since my background its blue.)

Your activity is ready to be sent to your students! Don’t forget to set it to “make a copy for each student”.
Here is the link to my completed activity if you want to use it or investigate.
Enjoy! If you make one of these, let me know how it goes!!!

7 thoughts on “Self-Checking Pixel Art Tutorial”